Attaching Schemas
Overview
Schemas define the structure of your data and enable the visual tree representation in the DataMapper. The DataMapper supports both XML Schema (XSD) and JSON Schema files for Source Body, Target Body, and Parameters.
If the data is not structured and just a primitive value, you don’t need to attach a schema file.
Attaching a Schema
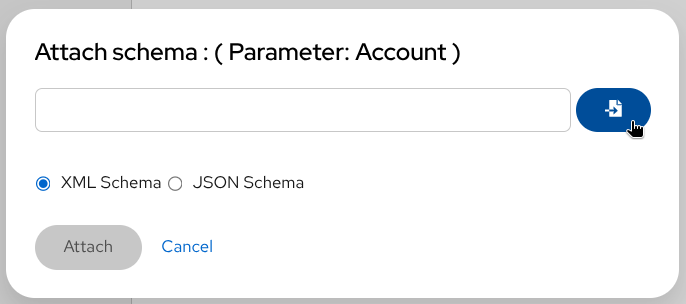
Follow these steps to attach a schema file to Source Body, Target Body, or Parameters:
- Place your schema file (
.xsdor.json) in the workspace directory - Click “Attach a schema” in the Source Body, Target Body, or Parameters section

Click to attach a schema - Click the file button in the modal
Select schema file - Select your schema file

Choose the schema file
You can select and upload multiple schema files at once.
- For XML schemas only: Choose the root element - Select which top-level element to use if your schema defines multiple
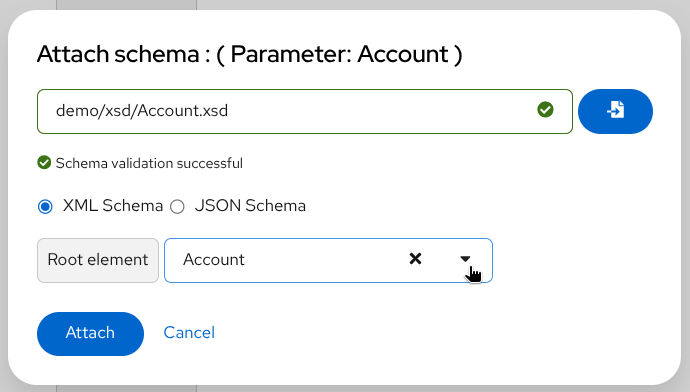
Choose root element for XML schema - Click Attach
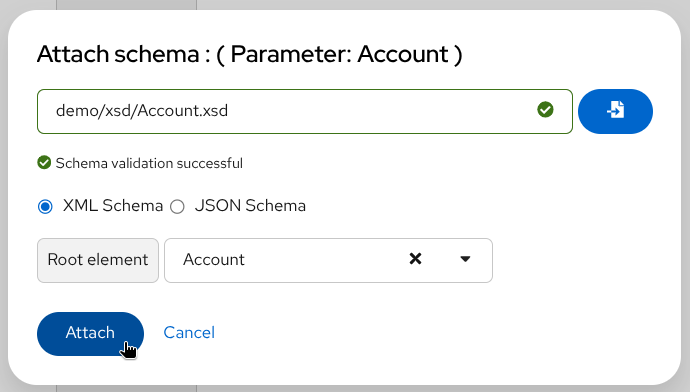
Confirm schema attachment - The document structure appears as a tree - The schema is parsed and rendered as an expandable tree view, showing all elements, attributes, and their hierarchical relationships. You can now navigate through the structure and create mappings by dragging fields between source and target sections.

Schema rendered as a tree
Detaching a Schema
To remove a schema from Source Body, Target Body, or Parameters, click the Detach schema button  and confirm the action.
Detaching a schema will remove all mappings associated with that schema. This action cannot be undone.
Understanding JSON Field Labels
Kaoto DataMapper uses XSLT 3.0 json-to-xml() and xml-to-json() functions to support JSON mappings. The field labels reflect this internal representation.
JSON schemas use type-based labels since fields can be anonymous:
| Label | Meaning |
|---|---|
map | Object field |
array | Array field |
string | String field |
number | Number field |
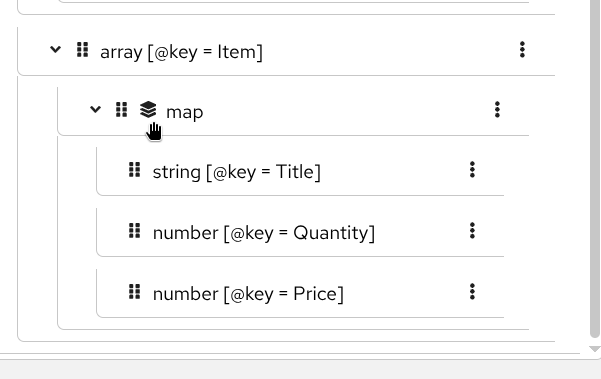
Field Label Examples
JSON schema fields are rendered with type-based labels in the tree view. Here’s how different field types appear:

Understanding the labels:
- Named fields display as
type [@key = FieldName]- For example,string [@key = AccountId]represents a string field named “AccountId” - Anonymous fields show only the type - For example,
maprepresents an unnamed object - Primitive types like
string,number,booleanindicate the data type - Complex types like
map(object) andarrayrepresent structured data
Array Fields and Collections
For array fields, the children are the collection items, not the array itself. Collection fields are marked with a layer icon  . The
. The map type field (child of the array field) is the actual collection field that you’ll use in for-each mappings.
JSON Parameter References
When using structured JSON parameters, they’re internally converted to XML. Reference them with a -x suffix in XPath expressions:
- Parameter
Accountbecomes$Account-x - Parameter
Cartbecomes$Cart-x
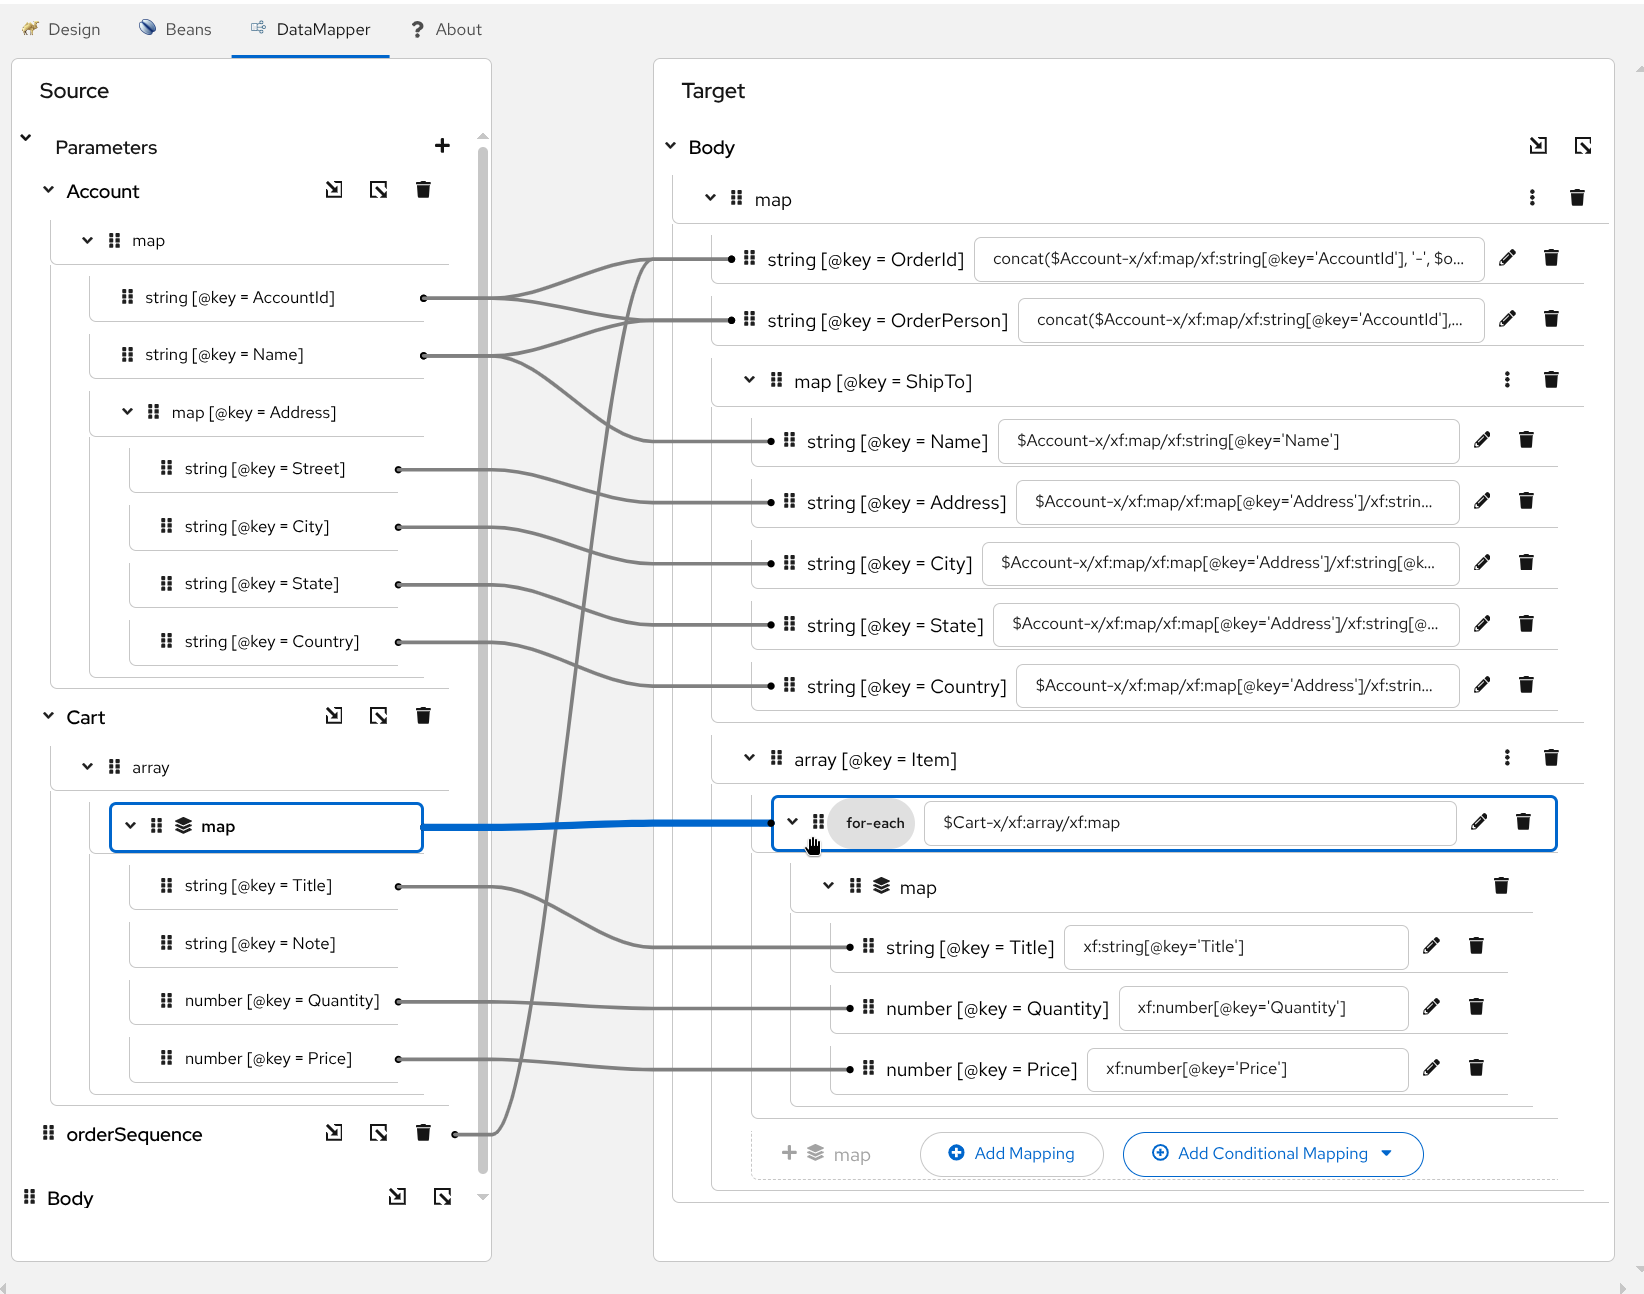
When creating mappings through drag and drop, Kaoto DataMapper automatically handles the -x suffix. You only need to remember this when editing XPath expressions manually.
Next Steps
Now that you have schemas attached:
- Create simple mappings between source and target fields
- Add conditional logic for complex transformations
- Use the XPath editor for advanced expressions