Conditional Mappings
Overview
The DataMapper supports three types of conditional mappings to handle complex transformation logic:
if- Execute mapping only when a condition is metchoose-when-otherwise- Branch based on multiple conditionsfor-each- Iterate over collection fields (arrays)
If Mapping
Create a mapping that only executes when a specific condition is true.
Steps
Click the 3-dot menu on the target field and select “wrap with if”
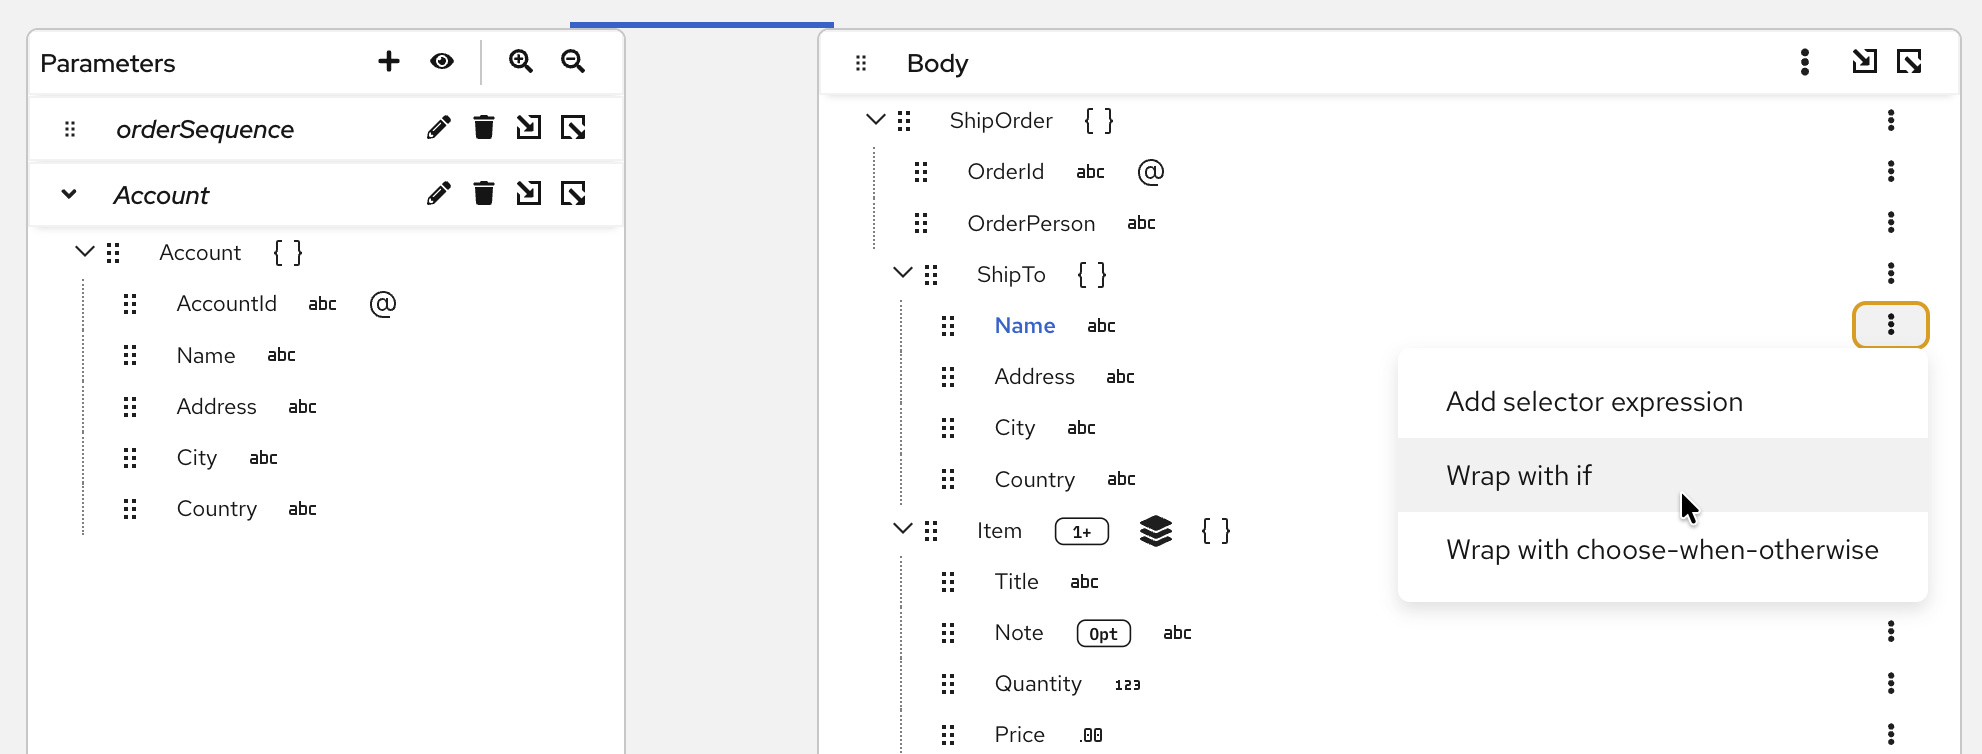
Select wrap with if Configure the condition - Drag source fields or type manually
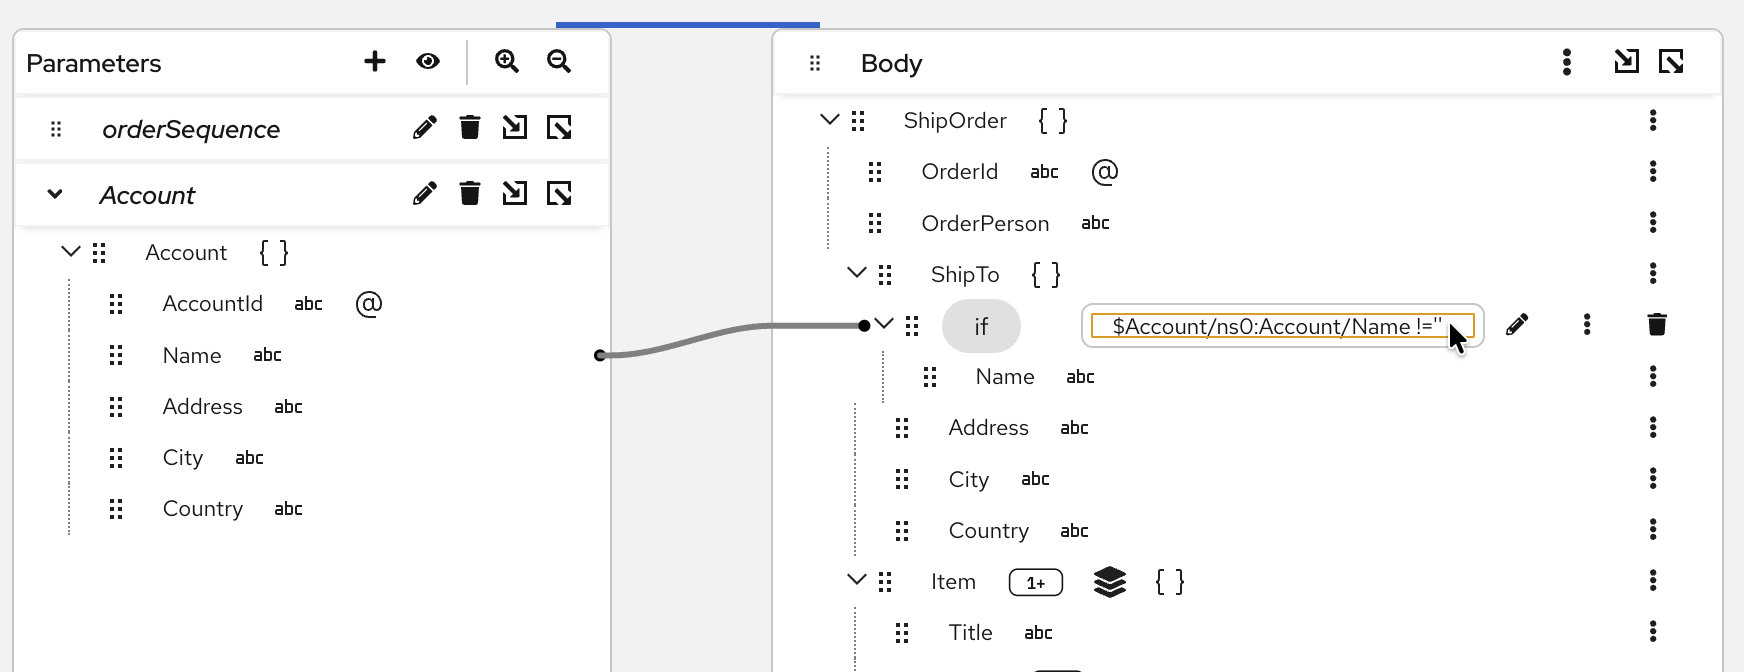
Define the if condition Create the mapping for when the condition is true
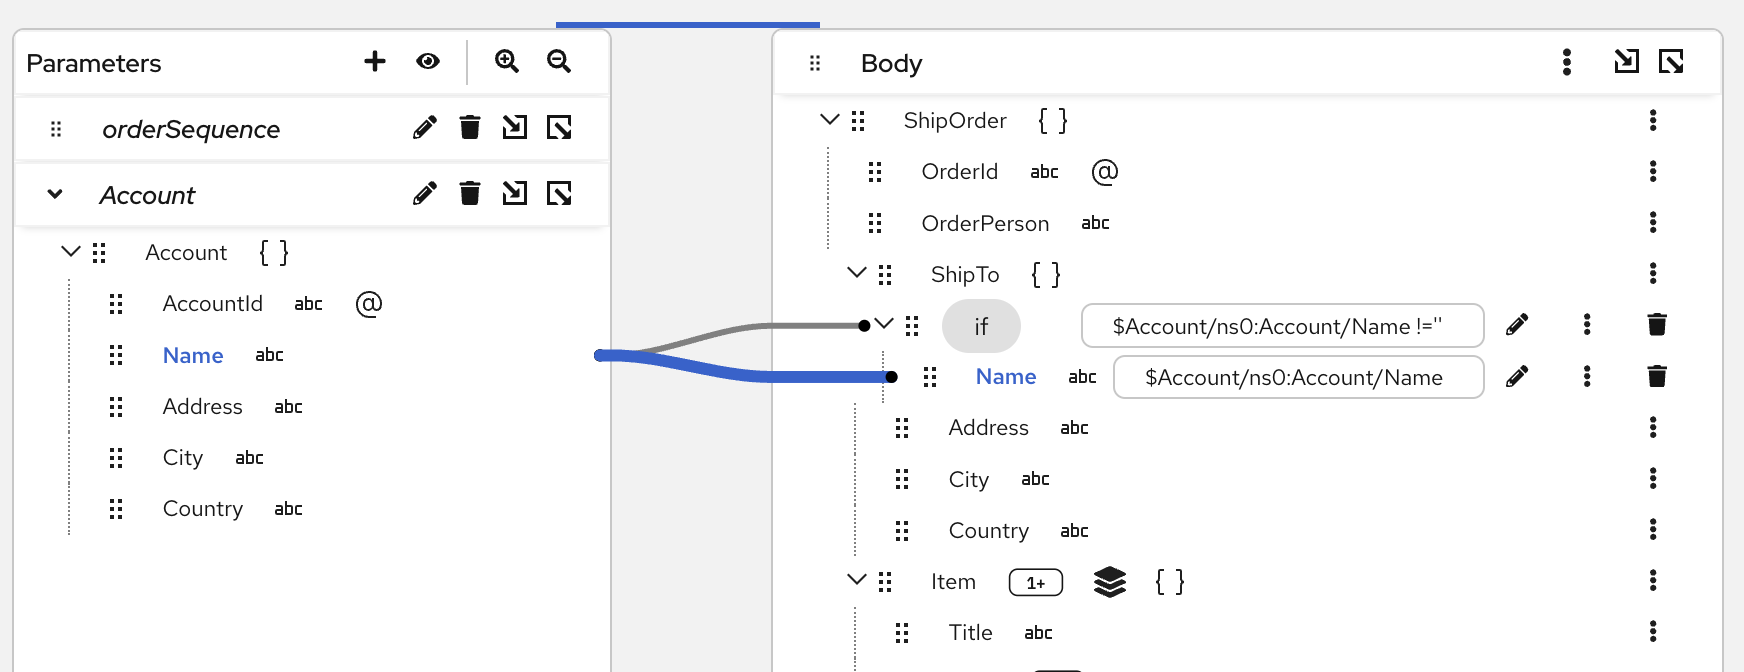
Configure the conditional mapping
You can drag source fields into the condition input to quickly build expressions like $sourceField > 100 or $status = 'active'.
Choose-When-Otherwise Mapping
Create branching logic with multiple conditions, similar to switch-case statements.
Steps
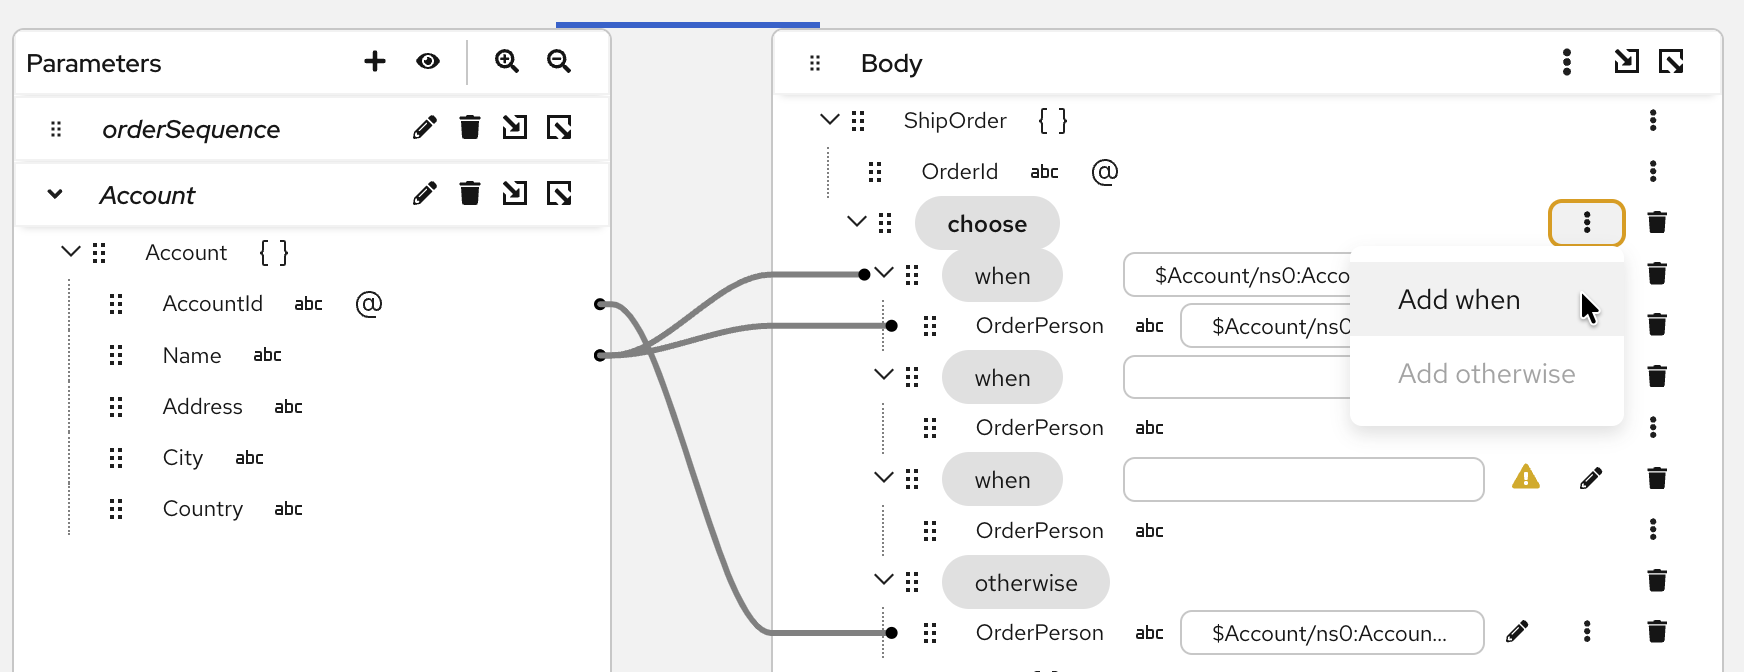
Click the 3-dot menu and select “wrap with choose-when-otherwise”
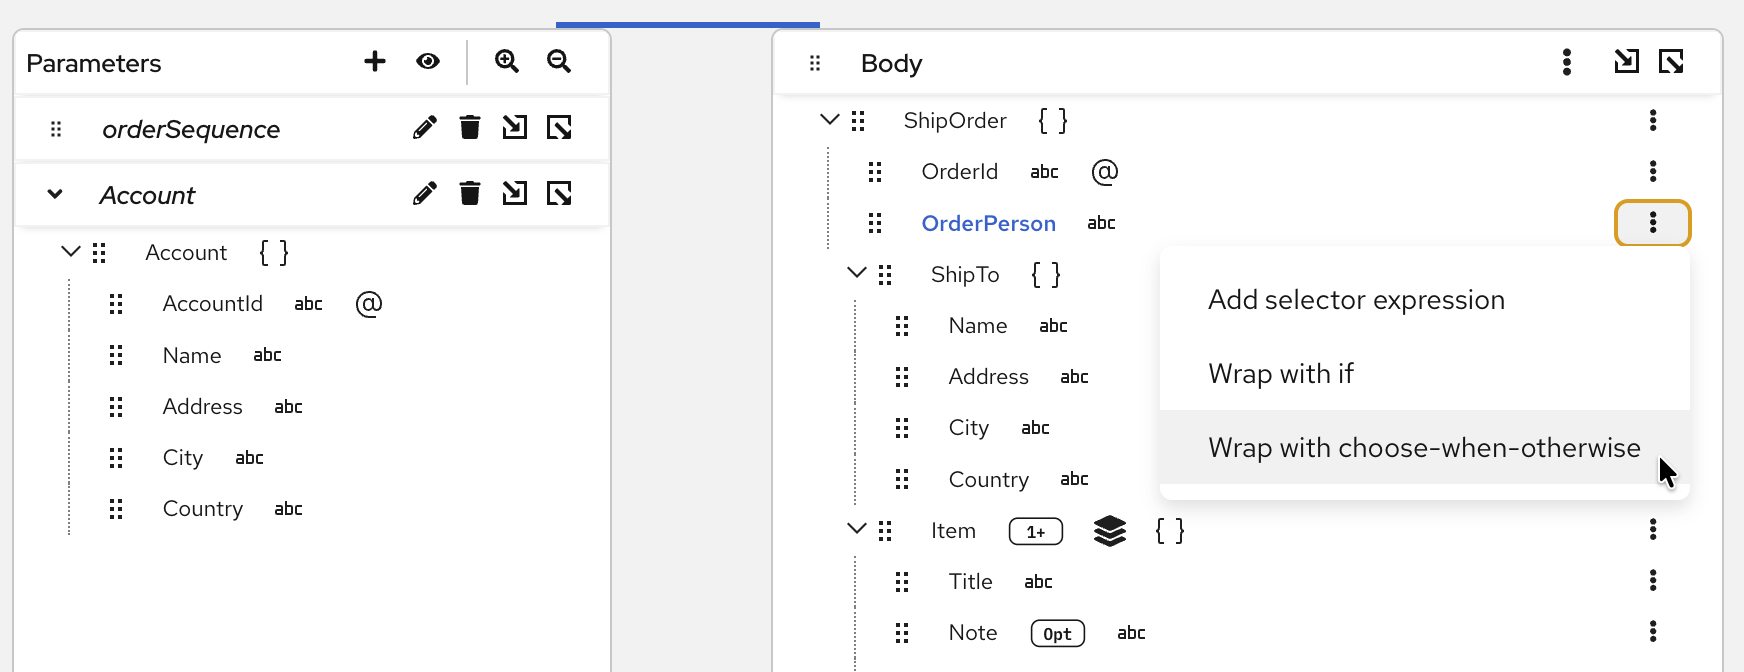
Select choose-when-otherwise Configure when and otherwise conditions - Similar to if mapping, configure the condition and create mappings for both when and otherwise branches

Configure when and otherwise mappings Add more when branches (optional) - If you need multiple conditions, click the 3-dot menu on the choose field and select “Add when” to create additional when branches. Each branch can have its own condition and mappings.
Add another when branch
The otherwise branch executes when none of the when conditions are satisfied, providing a default fallback.
For-Each Mapping
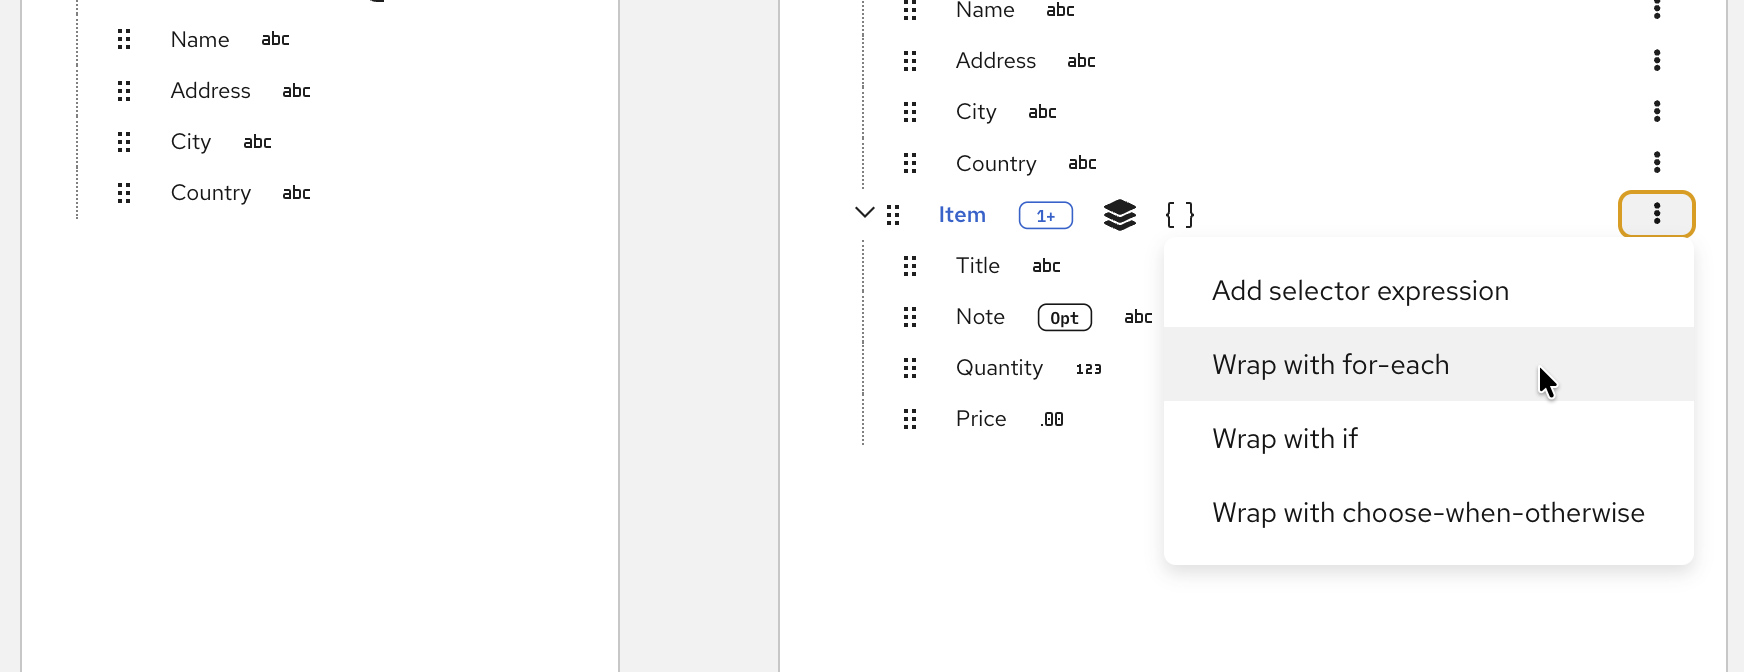
When working with arrays or repeating elements, use for-each mappings to transform each item in the collection. Collection fields are identified by a layer icon  in the document tree.
Steps
Identify the target collection field - Look for fields marked with the layer icon
, indicating they contain multiple itemsCreate the for-each mapping - Click the 3-dot menu on the target collection field and select “wrap with for-each”
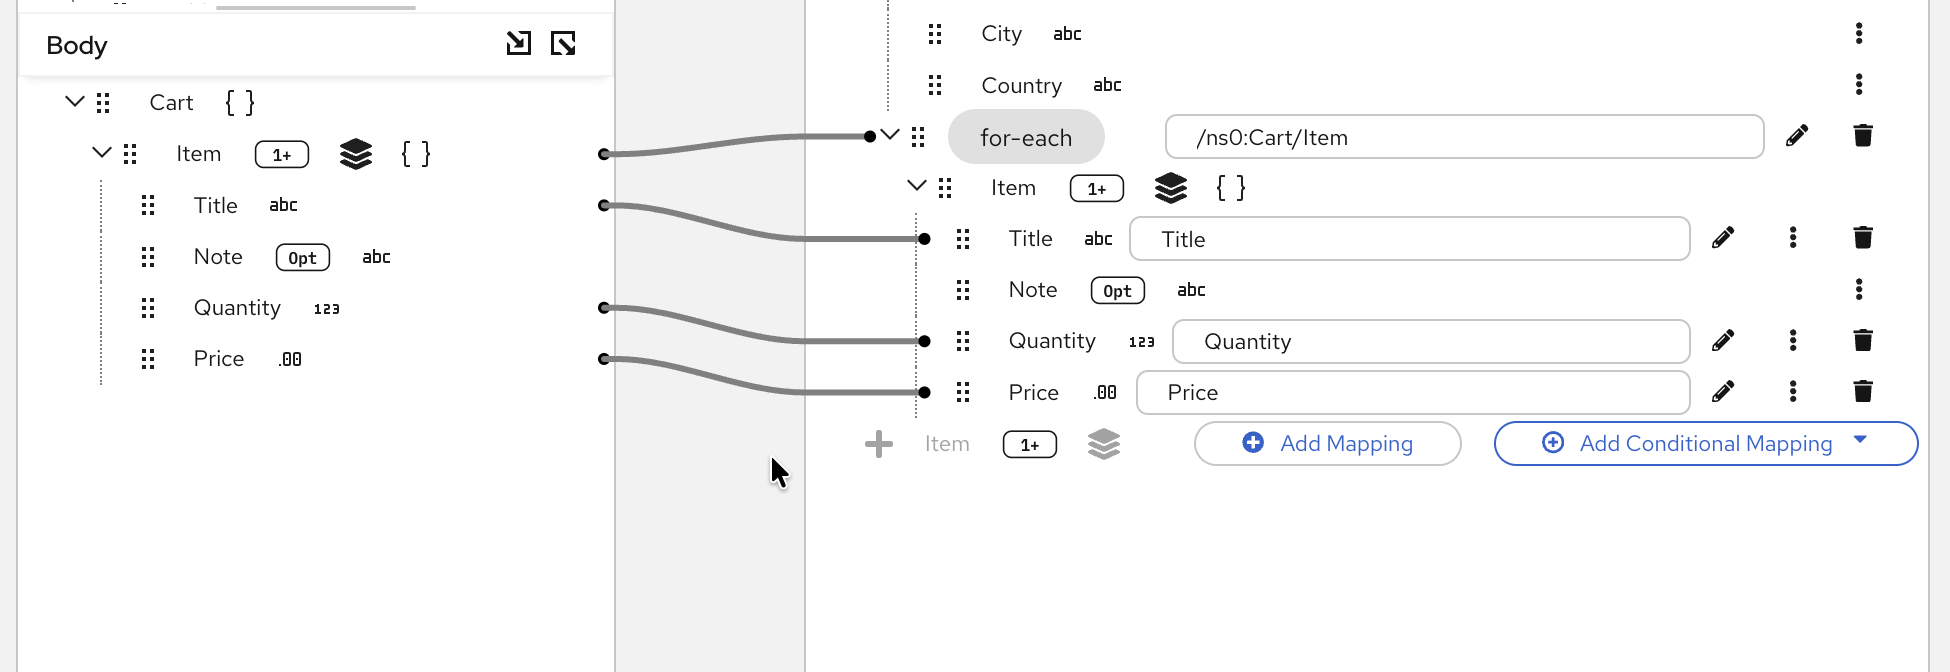
Select wrap with for-each Specify the source collection - Choose which source collection to iterate over. This determines what data will be processed for each target item.

Select source collection to iterate Map the collection item fields - Create mappings for individual fields within each collection item. These mappings will be applied to every item in the collection.
Map fields for each collection item
Inside a for-each mapping, field paths are relative to the collection item. For example, if iterating over Items, you reference Name instead of Items/Name.
Sorting For-Each Results
When iterating over a collection with for-each, you can configure sorting to control the order of the output elements. This adds xsl:sort to the generated xsl:for-each.
Steps
Create a for-each mapping as described above
Click the 3-dot menu on the
for-eachnode and select “Configure Sort”
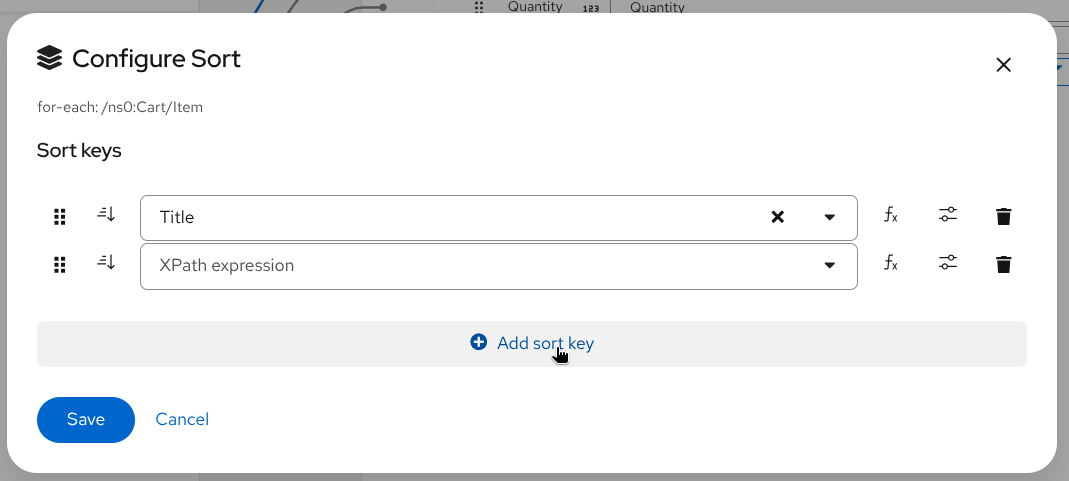
Select Configure Sort from the for-each context menu Configure sort keys in the modal dialog — enter the XPath expression for the field to sort by, or use the dropdown to select a field
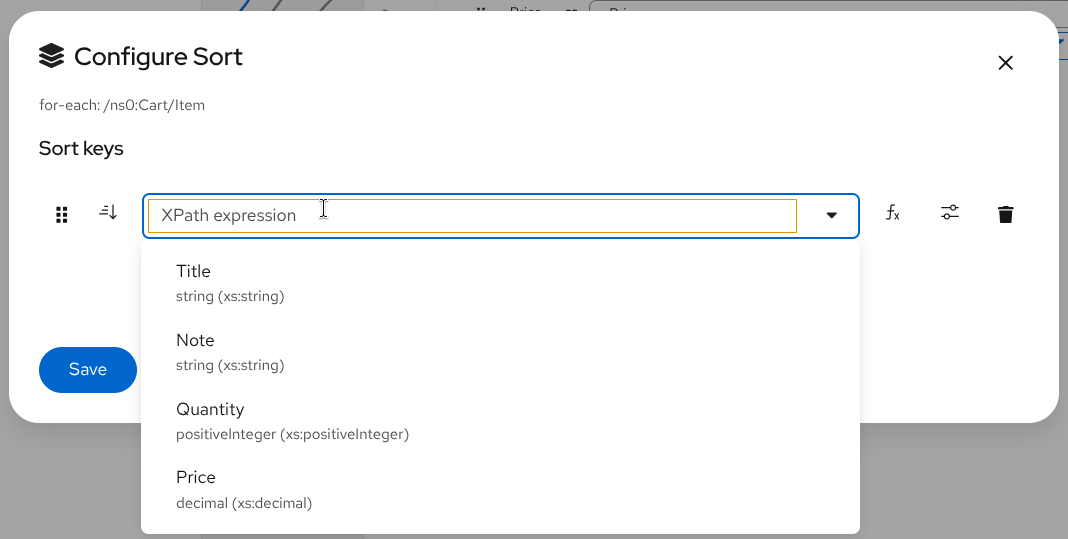
Configure Sort modal with sort key and options Add additional sort keys (optional) — click “Add sort key” to add secondary sort criteria. Items are sorted by the first key, then by the second key for ties, and so on. Drag the handle on the left to reorder sort keys.
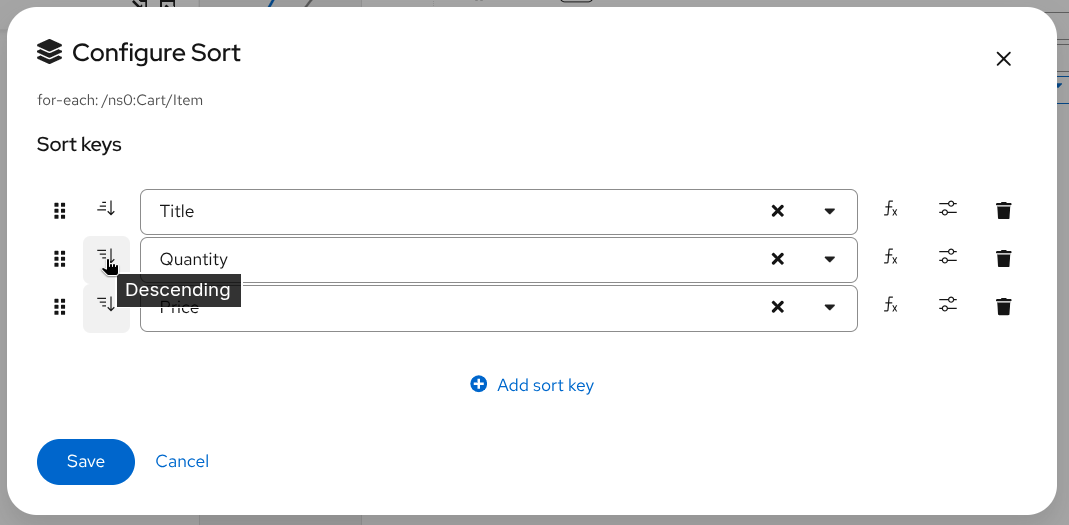
Add sort key Configure Ascending/Descending (optional) - click Ascending/Descending button to toggle the direction
Ascending/Descending Re-order sort keys by drag-and-drop (optional)
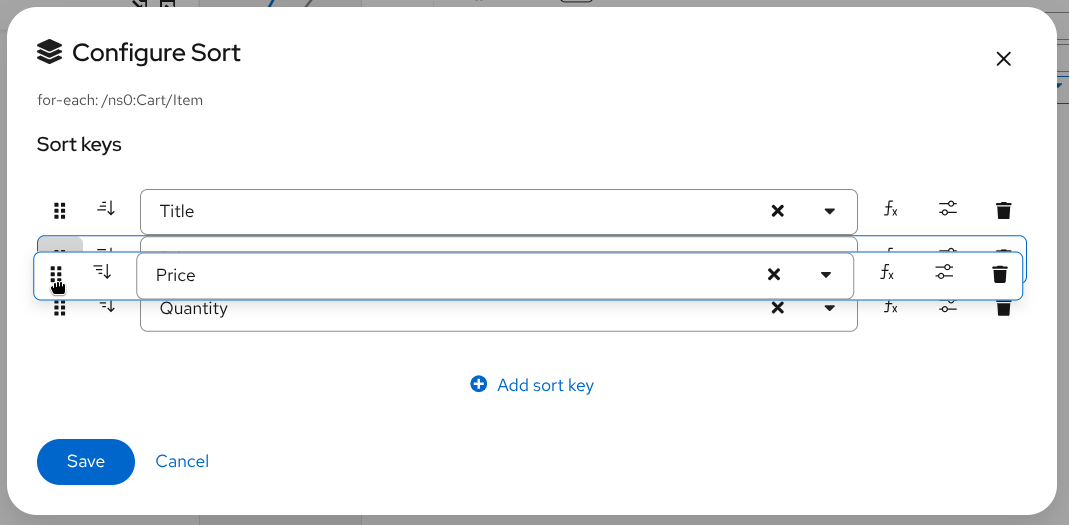
Re-order sort keys Configure sort key advanced properties (optional) - click slider button on the sort key to expand advanced properties
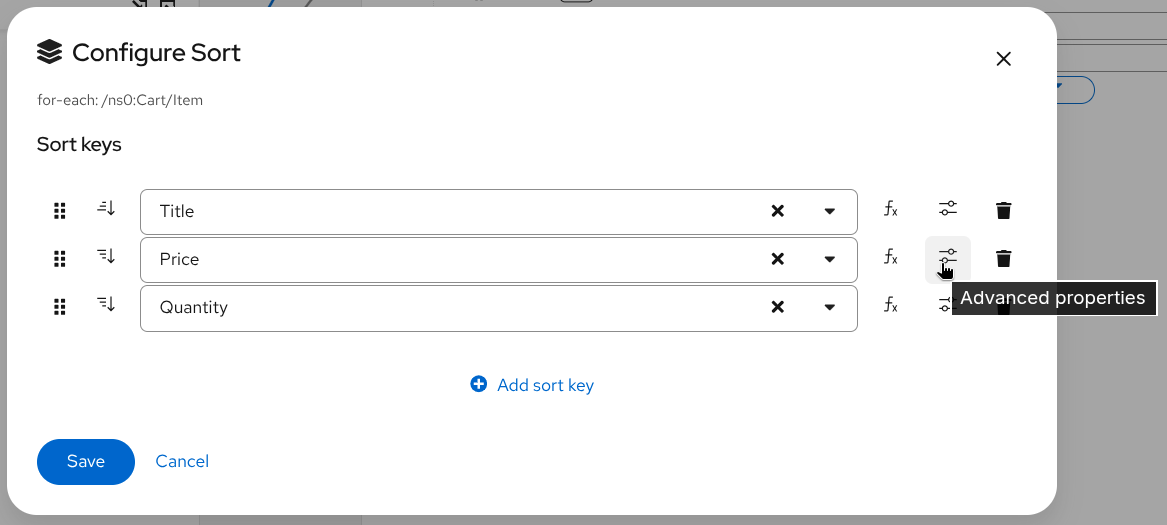
Configure Sort key advanced properties 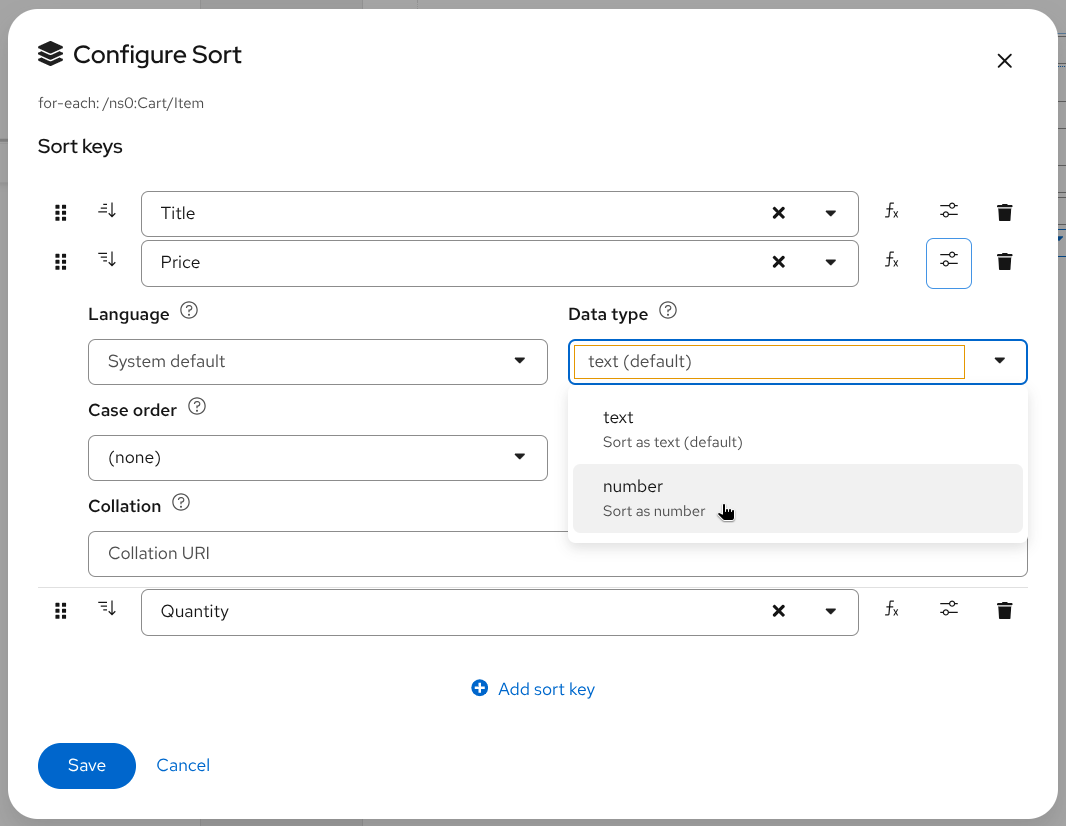
Advanced properties expanded Click Save to apply the sort configuration
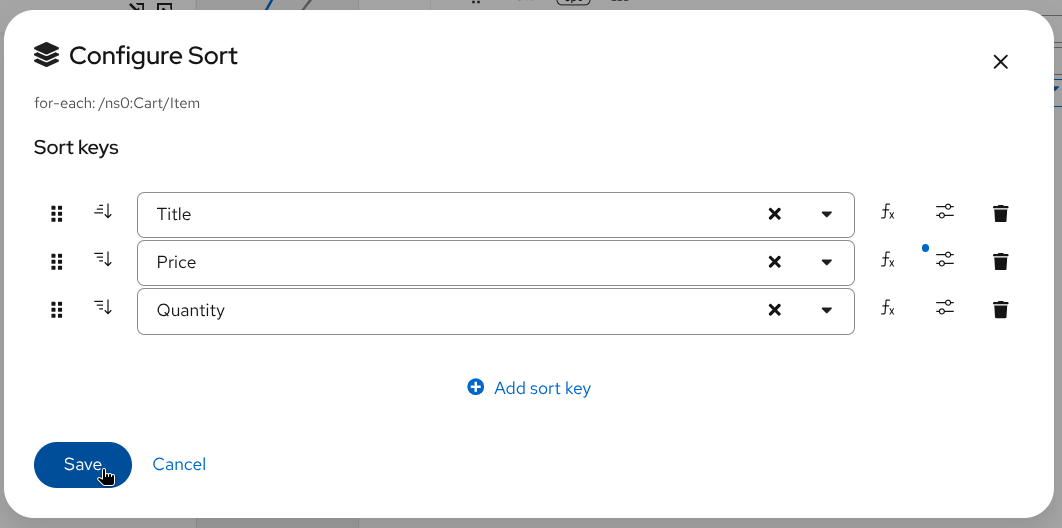
Save sort configuration
Multiple For-Each Mappings
Merge multiple source collections into a single target collection by adding multiple for-each mappings.
Steps
Create the first for-each mapping as described above
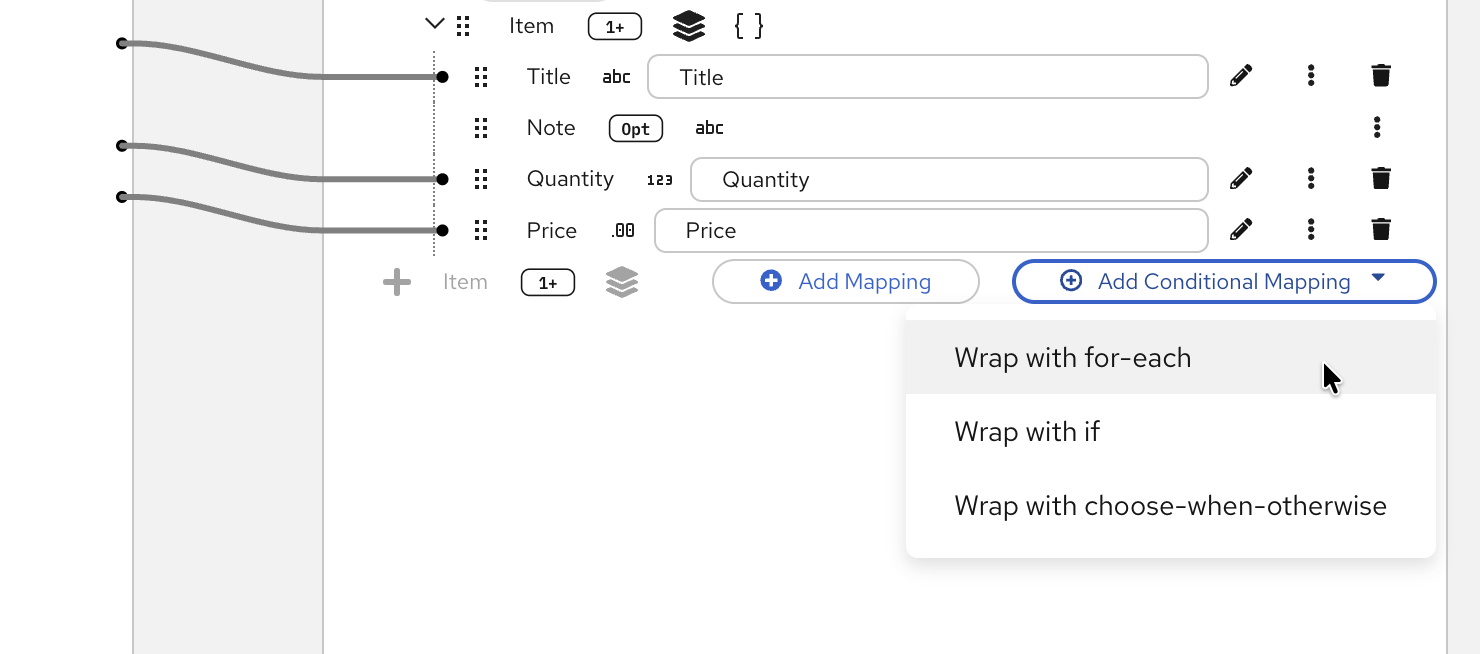
Add another for-each mapping - Click “Add Conditional Mapping” in the placeholder below the first mapping, then select “Wrap with for-each”
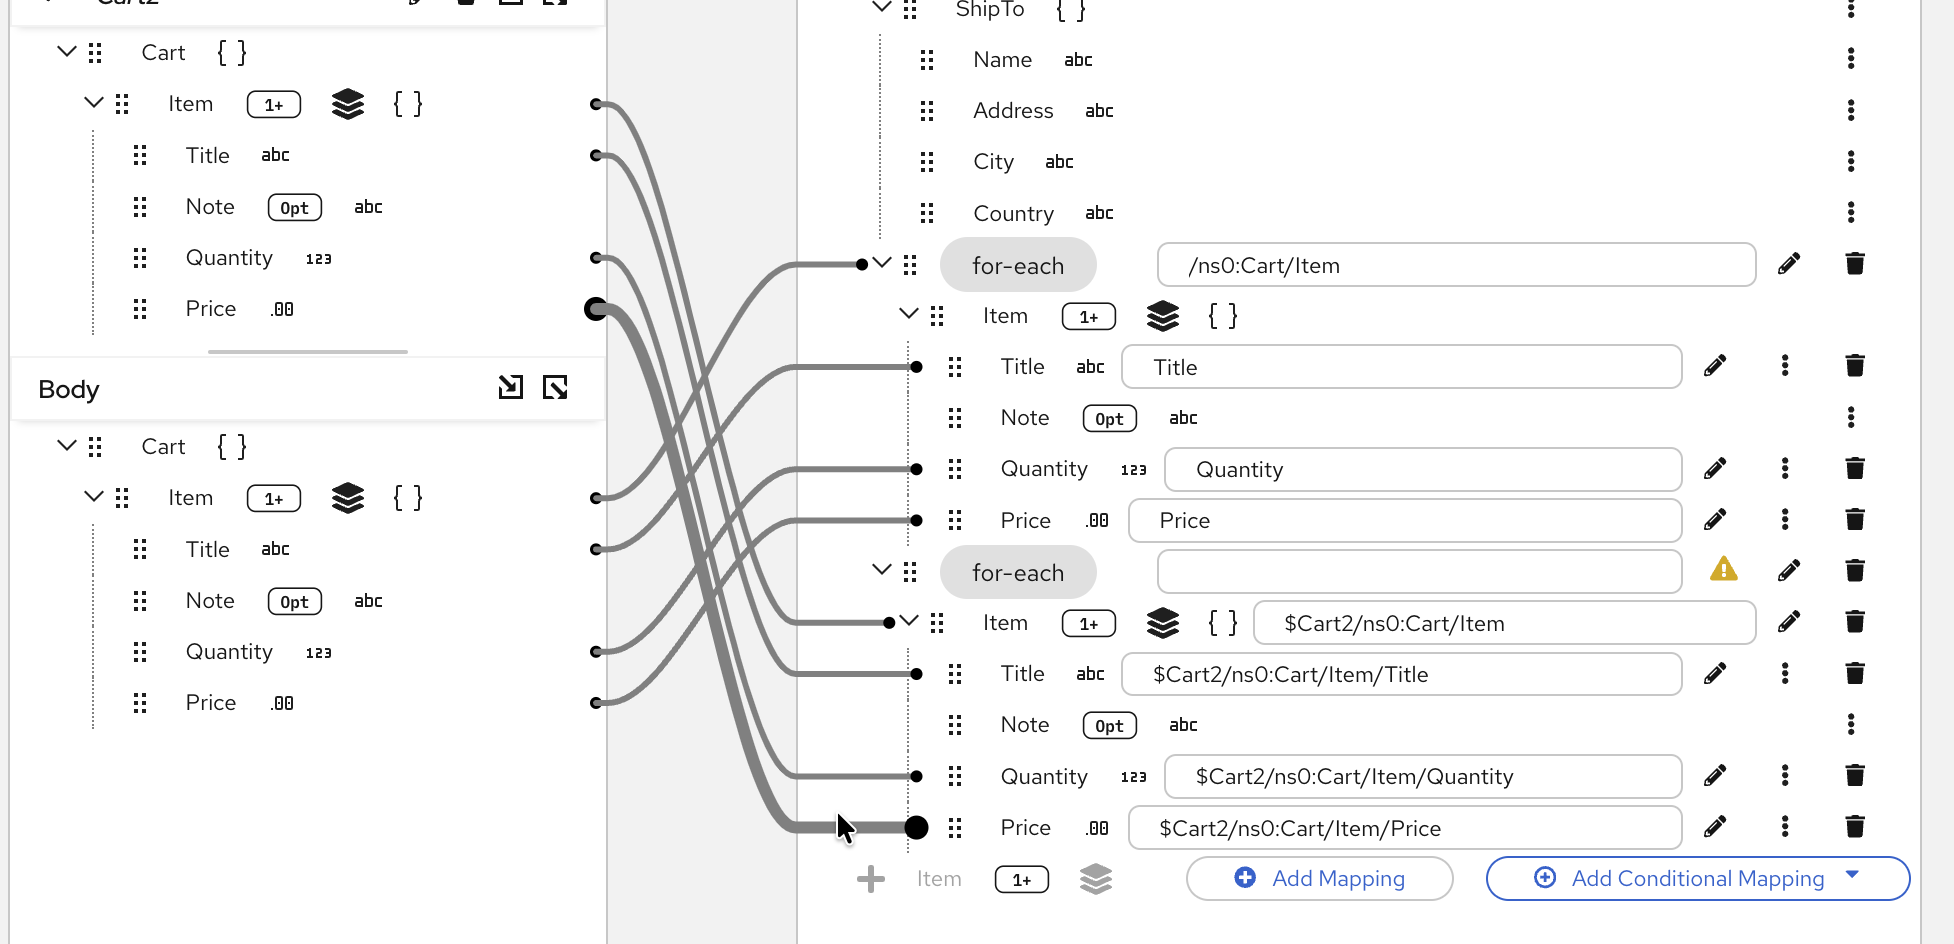
Add second for-each mapping Configure the second collection mappings - Select the second source collection to iterate over, then create field mappings for each item. This allows you to merge data from multiple collections into a single target array, combining items from different sources.
Configure second collection and map its fields
This technique is useful for merging data from multiple sources, such as combining orders from different systems into a single output array.
Next Steps
Now that you understand conditional mappings:
- Use the XPath editor for complex expressions with functions
- Return to the DataMapper overview to explore other features