Working with Nodes
Overview
In this section we will cover the basic operations you can perform on the nodes in your integration. This includes adding, replacing, deleting and enabling / disabling steps as well as generating documentation for your integration.
Adding a step
Now lets add a new step between the Timer and the Log component to modify the message body. There are two ways of adding a step to the route. You can either Right-Click on the step you want to insert before or after. This will bring up a context menu with the available actions to choose from. An easier alternative would be to hover over the connection between the two steps you want to insert between and then click on the + button that appears.
Hover over the connection between the Timer and the Log steps now and click the + button to execute the Add step action.
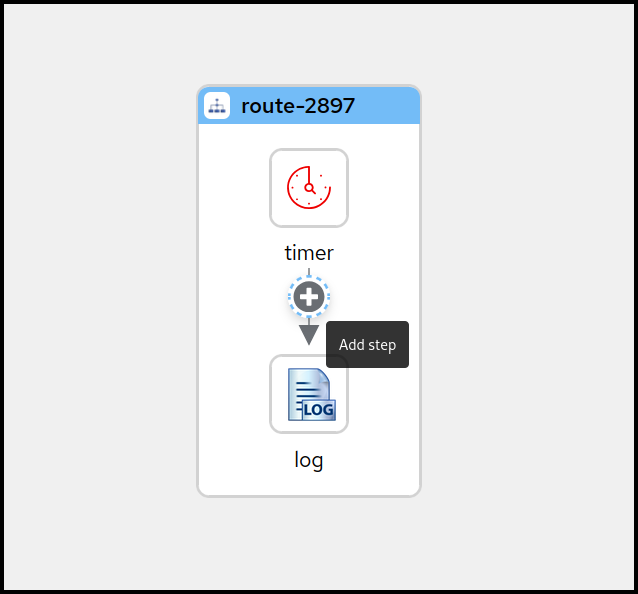
A Screenshot of the available step actions
When using the right-click context menu, the set of available actions depend on the selected step and can vary. There are actions for appending, prepending, replacing and deleting steps as well as some more specialized actions.
This will open up the Camel Catalog where you can search the step you want to add.
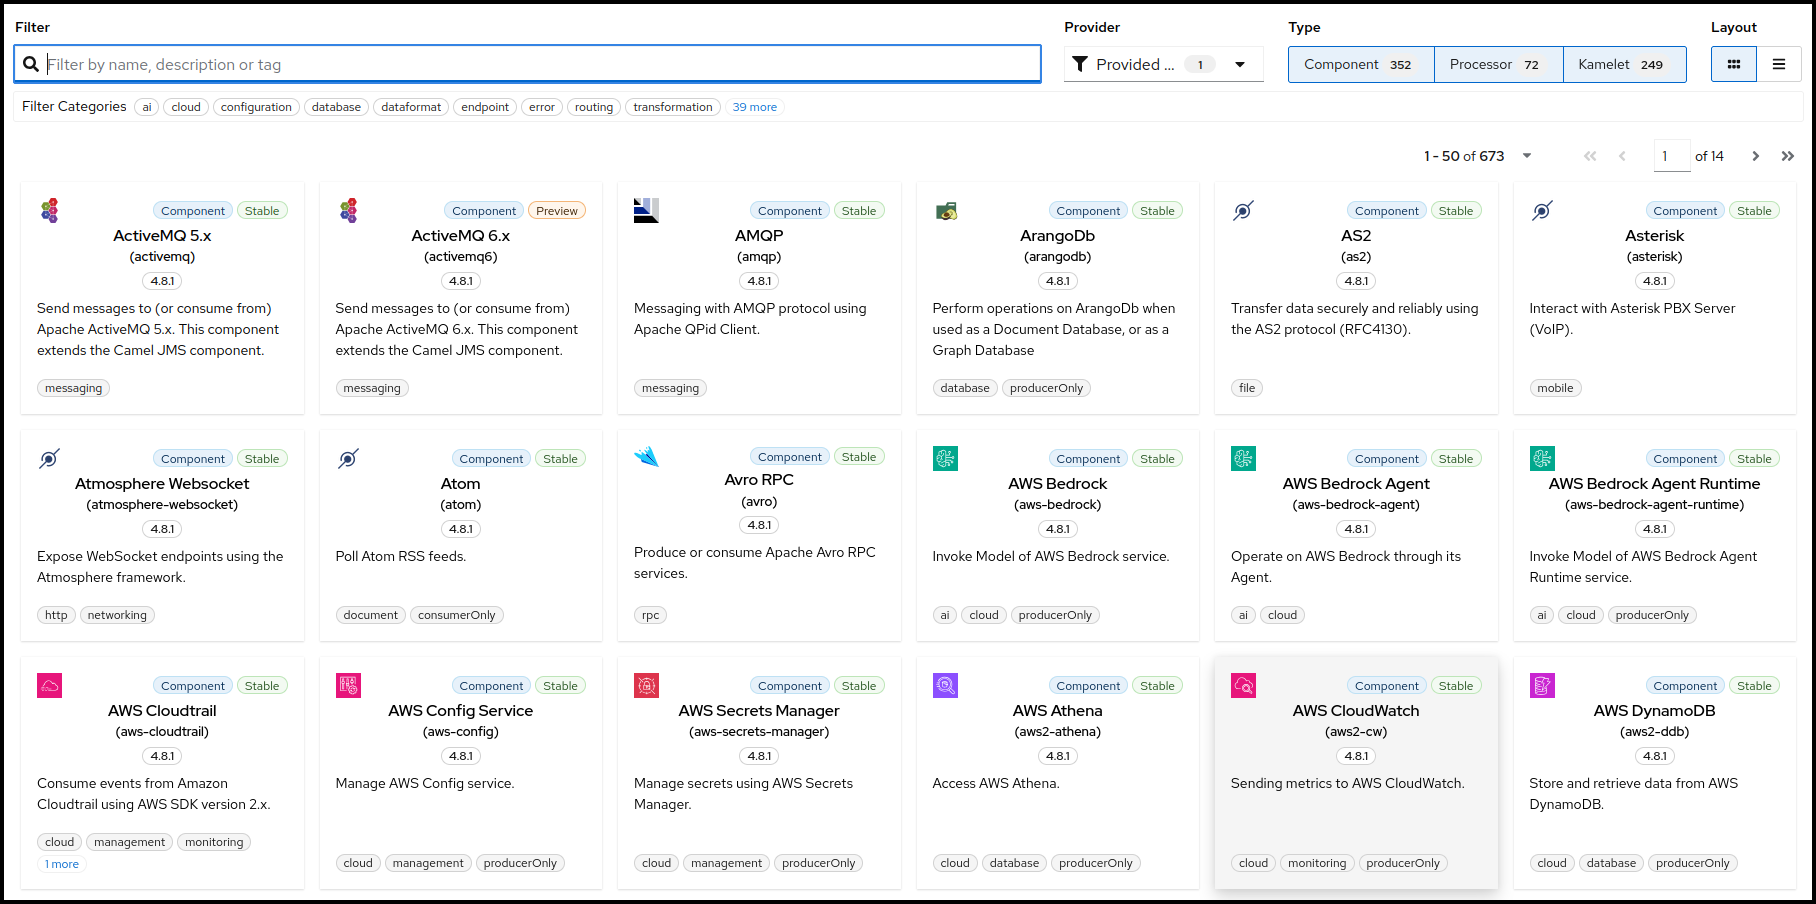
A Screenshot of the catalog of Camel steps
As already mentioned we would like to modify the message body before sending it along to the Log component. To achieve that we need to add a Processor called setBody. Let’s enter this name into the filter text field on top of the Catalog.
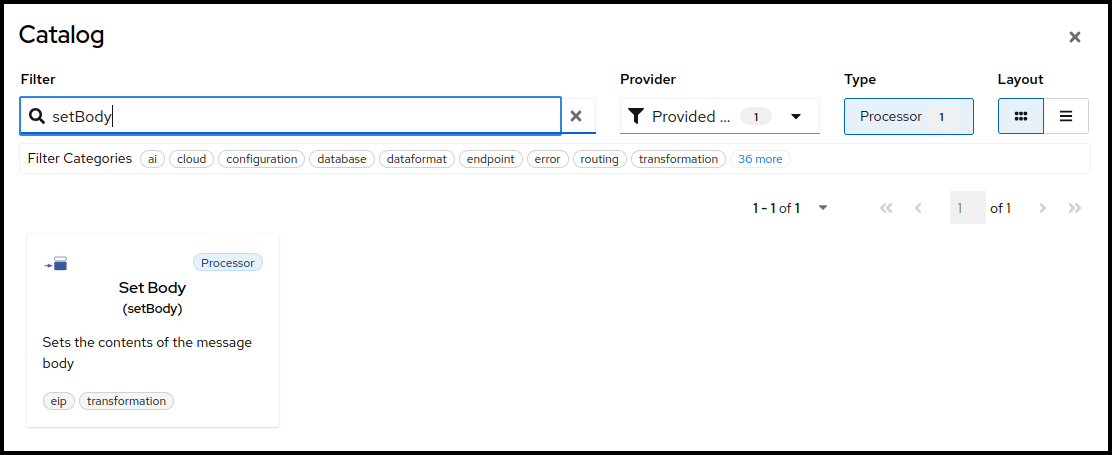
A Screenshot of the catalog of Camel steps filtering for setBody
You can now select the setBody tile to add it to your route. Select the new added step now on the canvas to open the configuration form to the right.
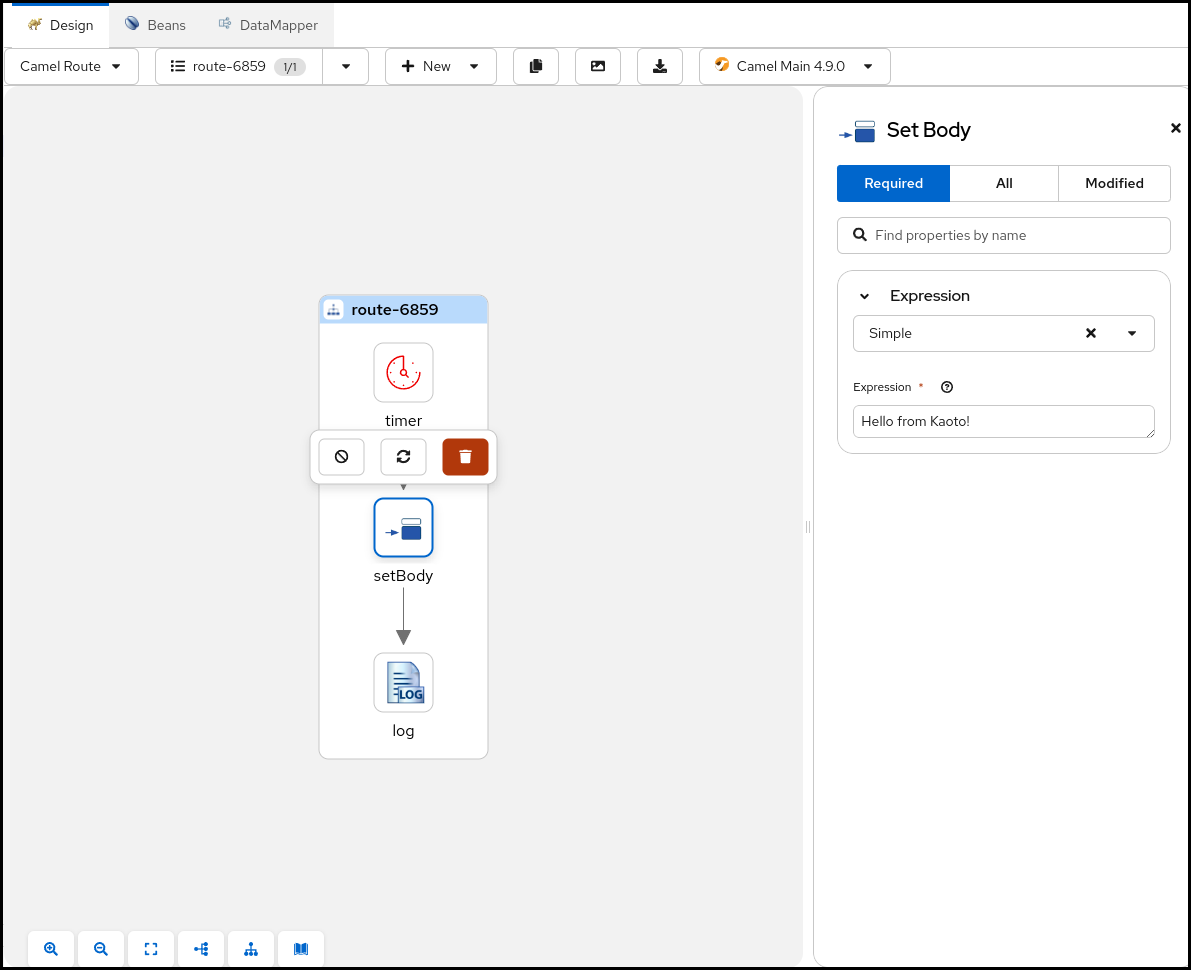
A Screenshot of the route with setBody selected and the configuration form opened
Let’s change the Expression text field to Hello from Kaoto!.
Now the Log component will receive a Hello from Kaoto! message every second and logs it to the console.
When using the right click context menu of a step, adding new steps is usually done with two actions. Prepend can be used to add a step before the selected step and Append will add the new step after the selected step. However, on the first step of a flow and on steps that can have children, the Add Step action is used.
Replacing a step
You can replace any step on the canvas by hovering over or by selecting the step. This will spawn a toolbar which contains a button for the Replace action.
A Screenshot of the toolbar for steps
Alternatively you can do that also by invoking the context menu on a step and selecting the item Replace. Both ways it will open up the Camel Catalog and you can choose the replacement from there.
Deleting a step
When invoking the Delete action on a step with children or on a container element containing children there will be a confirmation dialog because you are about to delete not just the single step or container but also all the contained children. Be cautious!
You can delete any step on the canvas by hovering over or by selecting the step. This will spawn a toolbar which contains a button for the Delete action.

A Screenshot of the toolbar for steps
Alternatively you can do that also by invoking the context menu on a step and selecting the item Delete. This will remove the step from your integration.
Enable / Disable a step
You can enable or disable any step on the canvas by hovering over or by selecting the step. This will spawn a toolbar which contains a button for the Enable / Disable action.
Disabling a step will instruct the Apache Camel runtime to ignore the step when executing the flow. This can be convenient when prototyping a new route.

A Screenshot of the toolbar for steps
Alternatively you can enable / disable any step in your route by invoking the context menu on a step and selecting the item Enable / Disable.

Showing a disabled step
In the picture above the Log component has been disabled. The icon is grayed out and there is a marker icon at the top right of the step to indicate it is disabled.
Generate Integration Documentation
You can use the built-in documentation generating feature to create a Markdown file containing all the steps in your integration and all the changed parameters for these steps together with an image of your integration.

A screenshot showing the generate documentation button
When you click the button it will open up a dialog with a preview of your integration documentation.
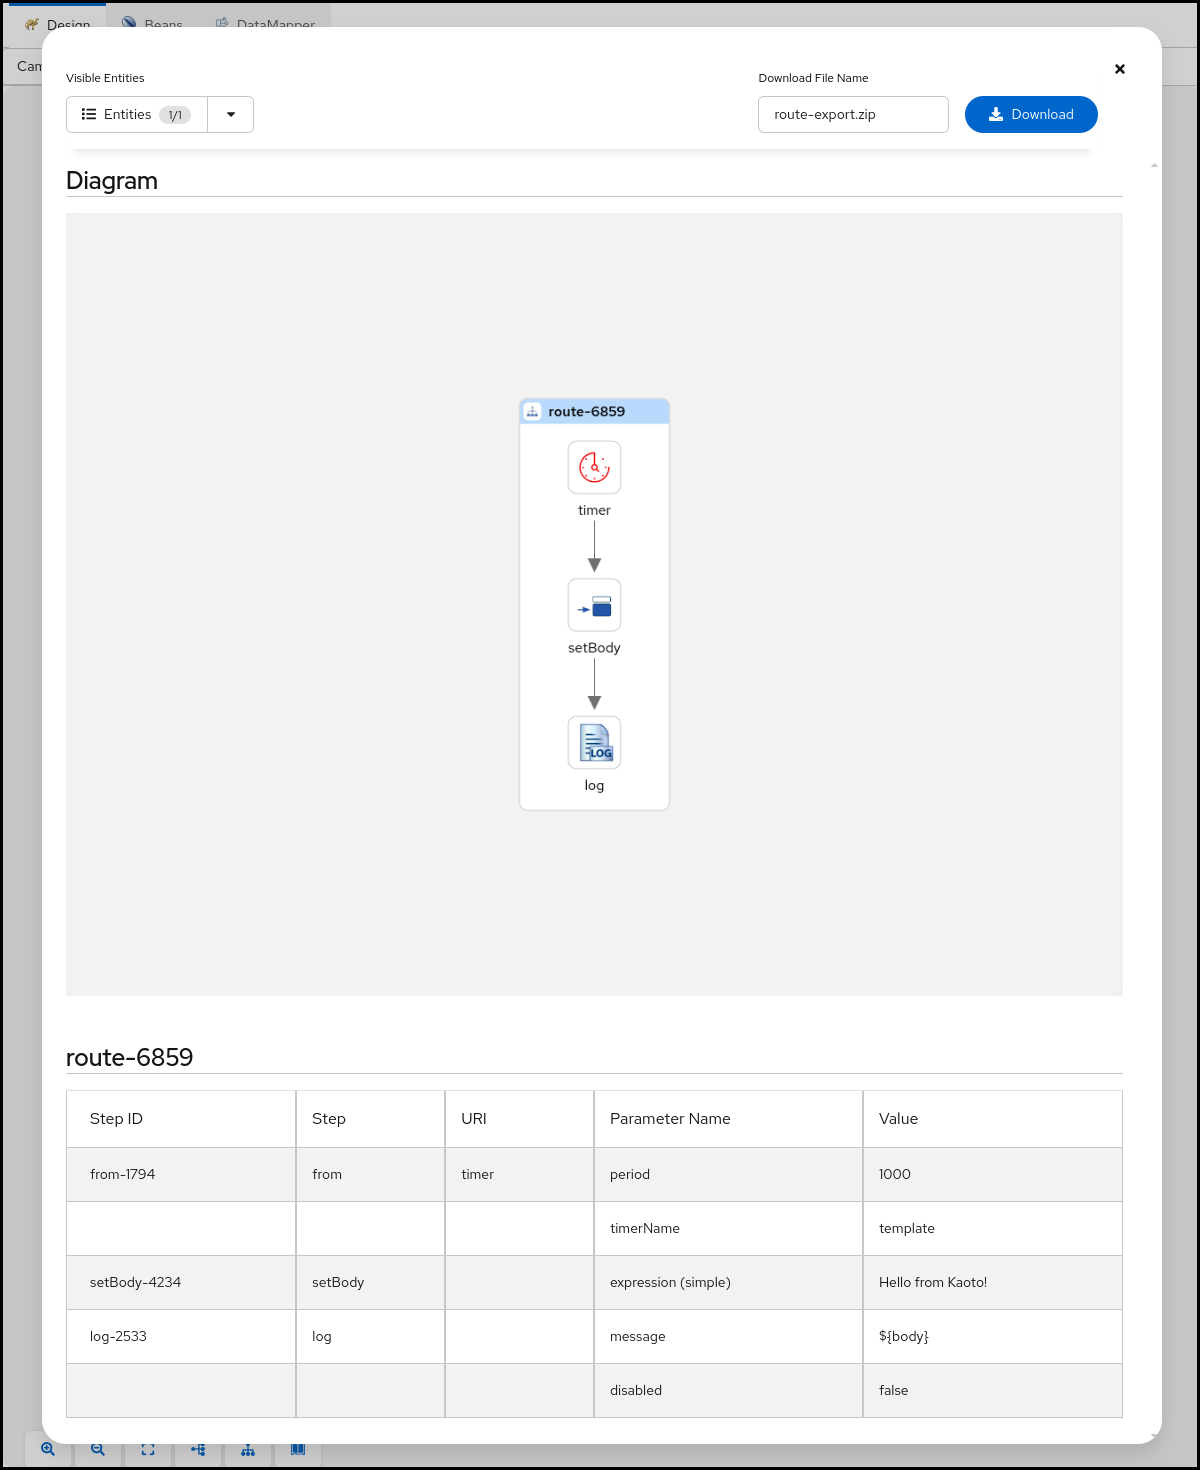
A screenshot showing the generate documentation dialog
You can use the Visible Entities control in the top left of the dialog to control which routes are part of the documentation. You can either select all, just a subset or even just a single route. Once you have made your choice you can specify a file name in the top right and then hit the Download button to retrieve the file in ZIP format.
Next Steps
Now that you understand how to work with nodes, explore these related topics:
- Reordering Nodes: Organize the flow of your integration logic
- Runtime Selector: Choose the right Camel runtime for your project