Executing Integrations
Overview
Kaoto makes it easy to run and test your Apache Camel integrations directly from VS Code. You can execute a single integration file, all integrations in a folder, or your entire workspace with just a click. This guide covers everything you need to know about running integrations locally using Kaoto’s built-in execution capabilities.
Prerequisites
Before running integrations in Kaoto, ensure you have completed the installation process. Visit the Installation Guide for detailed setup instructions.
Understanding Execution Scopes
Kaoto provides three execution scopes to match your workflow:
Single Integration Execution
Run a specific .camel.yaml or .camel.xml file to test individual integrations in isolation.

Use when:
- Testing a specific integration
- Debugging a single integration
- Developing a new integration
Folder Execution
Run all Camel integration files within a specific folder.

Use when:
- Testing related integrations together
- Running a module or feature set
- Verifying folder-level integration
Workspace Execution
Run all Camel integration files in your entire workspace.

Use when:
- Testing the complete application
- Running all integrations together
- Verifying end-to-end integration flows
Creating Your First Integration
Before executing integrations, you need to create one. Let’s create a simple integration to demonstrate execution.
Navigate to Kaoto Perspective
- Open VS Code
- Click on the Kaoto icon in the Activity Bar (left sidebar)
- The Kaoto perspective will open, showing the route designer
Create a New Camel Route
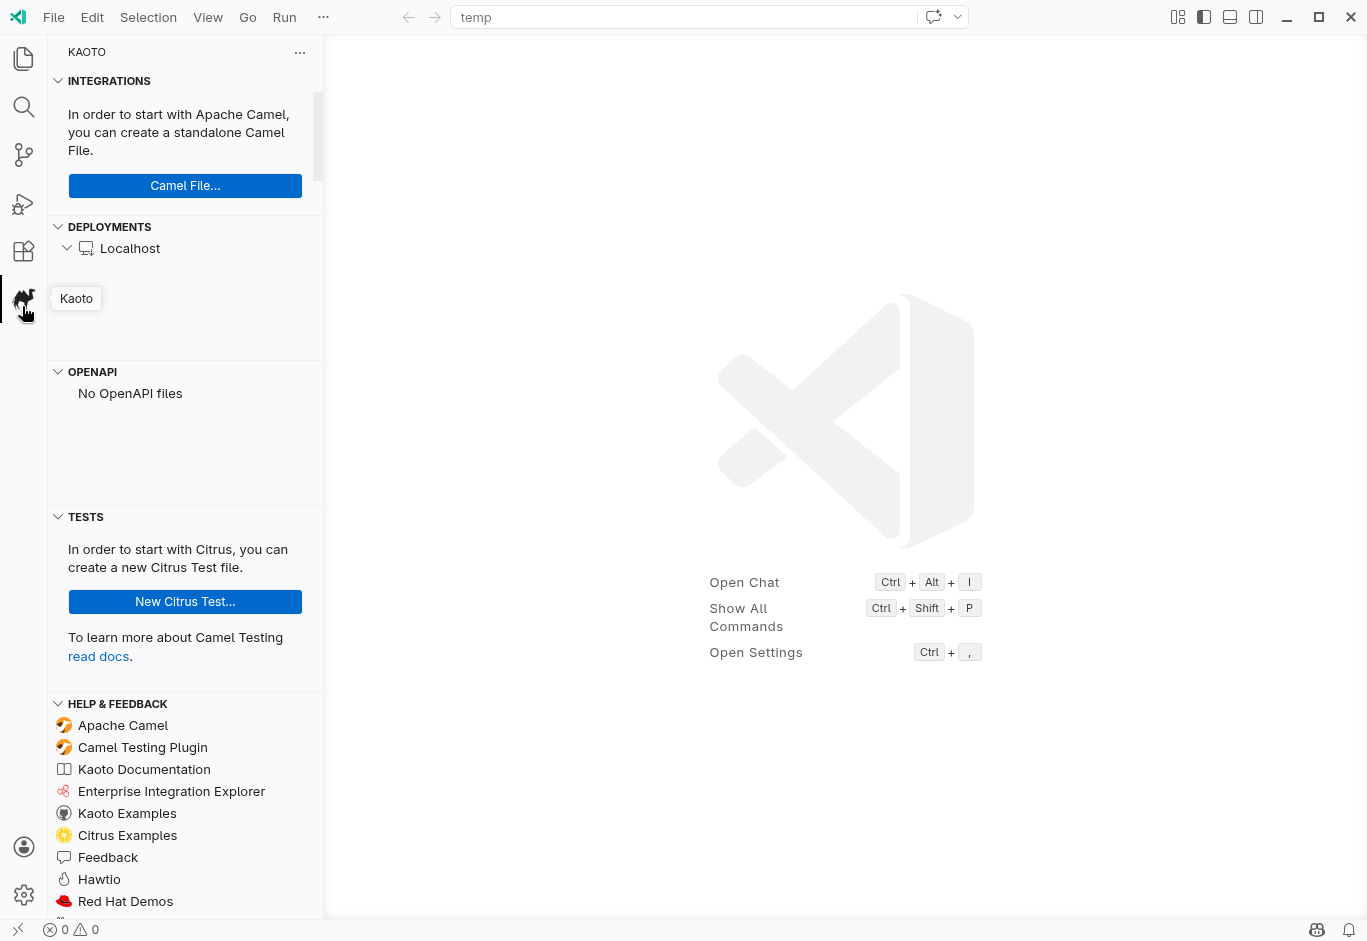
In the Kaoto perspective, click “Camel File…”
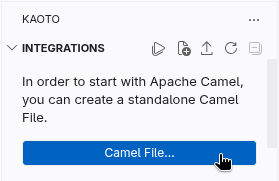
New Camel file Choose “Camel Route” as the route type
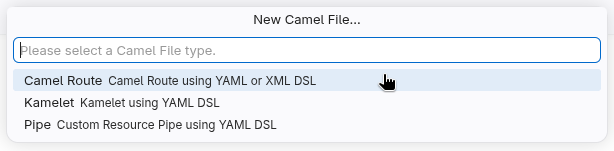
Camel route item Choose between “YAML DSL” or “XML DSL” as the route type
YAML DSL item Give a name to the new route

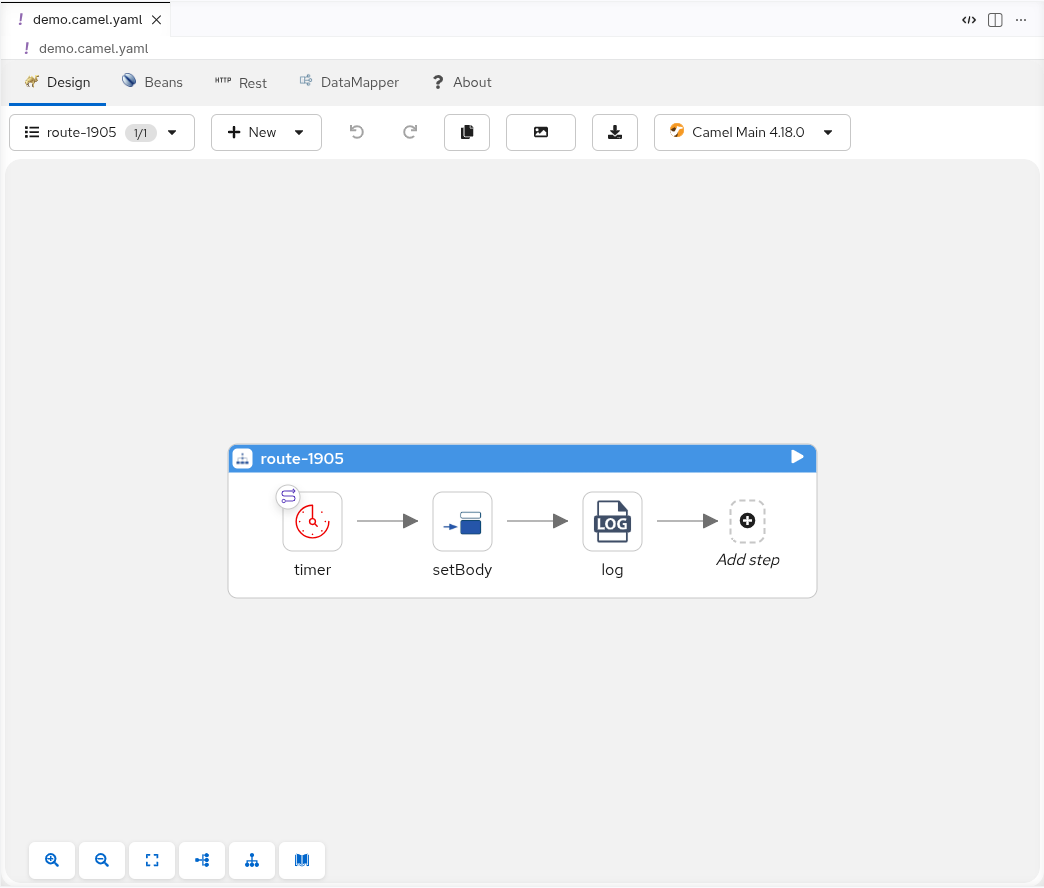
New route name A basic timer-based route will be created automatically
Running a Single Integration
To run a single integration file:
Open the Kaoto perspective in VS Code
In the Integrations panel, locate your integration file (e.g.,
demo.camel.yaml)Click the Play button (▶️) next to the integration file name
Click the Play button next to your integration file A new terminal will open showing Camel JBang starting your integration
Expected Output:
INFO 26484 --- [           main] e.camel.impl.engine.AbstractCamelContext : Routes startup (total:1)
INFO 26484 --- [           main] e.camel.impl.engine.AbstractCamelContext :     Started route-3169 (timer://template)
INFO 26484 --- [           main] e.camel.impl.engine.AbstractCamelContext : Apache Camel 4.18.0 (demo) started in 276ms (build:0ms init:0ms start:276ms boot:275ms)
The integration is now running and will continue until you stop it.
Configuration Files: If an application-dev.properties file exists in the same directory as your integration file, Kaoto will automatically load it to configure your integration. This is useful for development-specific settings like connection strings, ports, or feature flags.
Stopping a Running Integration
You have two options to stop a running integration:
Option 1: Using the Deployments Panel
Navigate to the Deployments panel and click the Stop button (⏹️) next to your running integration:

Option 2: Using the Terminal
- Go to the terminal where Camel is running
- Press
Ctrl + C(orCmd + Con macOS)
Running a Folder
To run all integrations within a specific folder:
- In the Integrations panel, locate the folder containing your integrations
- Ensure the folder contains one or more
.camel.yamlor.camel.xmlfiles - Click the Play button (▶️) next to the folder name
- Kaoto will start all integration files within that folder in a single Camel context
- A new terminal opens showing all integrations starting together
Classpath Behavior: When running a folder, all files in that folder are automatically added to the classpath. This includes:
application.propertiesandapplication-dev.propertiesfor configuration.jarfiles for custom dependencies- Resource files needed by your integrations
This makes it easy to organize related integrations with their configuration and dependencies in a single folder.
Running the Workspace
To run all integrations in your entire workspace:
- In the Integrations panel, locate the workspace root or “Integrations” label
- Look for the Play button (▶️) at the workspace level
- Click the Play button (▶️) next to “Integrations” or the workspace root
- Kaoto will discover and start all integration files in your workspace
- A new terminal opens showing all integrations starting together
Workspace Execution Benefits:
- Ideal for testing how all your integrations work together in a complete application context
- All workspace files are added to the classpath, including properties files, JARs, and resources
- Configuration files like
application.propertiesat the workspace root apply to all integrations
Common Execution Patterns
Development Workflow
- Create an integration in Kaoto’s visual designer
- Run the single integration to test basic functionality
- Modify the integration based on test results
- Run the folder to test with related integrations
- Run the workspace to verify complete integration
Testing Strategy
- Unit testing: Run single integrations in isolation
- Integration testing: Run folders with related integrations
- System testing: Run the entire workspace
Debugging Approach
- Start with single integration execution to isolate issues
- Add log processors to track message flow
- Use the terminal output to identify problems
- Make incremental changes and re-run
Troubleshooting
Integration Won’t Start
Problem: Clicking the play button does nothing or shows an error.
Solutions:
- Verify JBang is installed by running:
jbang version - Check Java is installed by running:
java -version(Java 17 or later required) - Look for error messages in the VS Code Output panel (View → Output)
- Check the Terminal panel for startup errors
- Ensure your integration file has valid YAML/XML syntax
Port Already in Use
Problem: Error message indicating port 8080 (or another port) is already in use.
Solutions:
- Stop other running integrations using the Deployments panel
- Check for other applications using the same port
- Configure a different port in your integration or application properties
- Kill the process using the port:
lsof -ti:8080 | xargs kill -9(macOS/Linux)
Integration Starts But Doesn’t Work
Problem: Integration starts successfully but doesn’t process messages.
Solutions:
- Check component configuration (URIs, parameters)
- Verify file paths and directories exist
- Add log processors to track message flow
- Review terminal output for warnings
Multiple Integrations Conflict
Problem: Integrations interfere with each other when running together.
Solutions:
- Check for duplicate endpoint URIs
- Verify integrations don’t compete for the same resources
- Use unique IDs for all integrations and components
- Consider running integrations in separate folders
Best Practices
Integration Organization
- Group related integrations: Keep related integrations in the same folder for easier management
- Use meaningful names: Name files descriptively (e.g.,
order-processing.camel.yaml,customer-sync.camel.yaml) - One integration per file: Recommended approach for better organization, testing, and version control
- Separate concerns: Use different folders for different modules, features, or business domains
- Consistent naming: Follow a naming convention across your project (e.g.,
domain-action.camel.yaml)
Execution Strategy
- Test incrementally: Start with single integrations, then folders, then workspace
- Use workspace settings: Configure Kaoto settings at workspace level (
.vscode/settings.json), not globally - Monitor output: Keep the terminal visible during development to catch errors early
- Stop when done: Always stop integrations when finished testing to free up resources
- Clean restarts: Stop all integrations before making significant changes
- Use logs effectively: Add log processors at key points for debugging
Configuration Management
Understanding Property Files
Kaoto supports two types of property files for configuring your integrations:
application.properties
- Base configuration file for all environments
- Contains common settings shared across development, testing, and production
- Always loaded when present in the integration directory
- Example use cases: component URIs, timeout values, retry policies
application-dev.properties
- Development-specific configuration file
- Automatically loaded by Kaoto when running integrations locally
- Overrides values from
application.propertieswhen both exist - Perfect for: local database connections, debug settings, development API keys
- Not deployed to production environments
Priority Order: When both files exist, application-dev.properties takes precedence over application.properties for any overlapping properties.
Example Setup:
# application.properties (shared settings)
api.timeout=30000
# application-dev.properties (development overrides)
api.debug=true
Best Practices
- Use property files: Store configuration in
application.propertiesfor shared settings - Development overrides: Use
application-dev.propertiesfor local development settings - Environment-specific settings: Create separate property files for test/prod environments
- Secure credentials: Never hardcode sensitive data in integrations or commit secrets to version control
- Document settings: Add comments to property files explaining each configuration value
- Version control: Commit
application.propertiesbut consider excludingapplication-dev.propertiesif it contains sensitive local settings