API-First Approach
Introduction
The API-first approach in Kaoto allows you to link an OpenAPI specification directly to your REST service. Instead of manually creating each endpoint, you reference the OpenAPI file and Apache Camel reads the specification at runtime to create all REST endpoints. The OpenAPI specification file must be kept with your integration as Camel needs it to run. Kaoto visualizes the direct route in the Design view.
OpenAPI vs OpenAI: OpenAPI (formerly known as Swagger) is an API specification standard and is not related to OpenAI (the company behind ChatGPT). The Apache Camel OpenAPI component works with OpenAPI specifications for REST API integration.
Create the Route File in Kaoto
Step 1: Link the OpenAPI Specification
This is the key step in the API-first approach.
Click Rest in the top navigation, then Actions, and select + Add Service from the dropdown
Add the
book-summary-api.openapi.yamlfile to your workspace at the same level as your route fileClick the pencil icon next to Open Api and enter the path to your OpenAPI file
This adds the REST DSL block with the openApi.specification property:
- rest:
    id: rest-1736
    openApi:
      specification: book-summary-api.openapi.yaml
This is the API-first magic: By linking the OpenAPI specification, Apache Camel:
- Reads the OpenAPI file at runtime (the file must be present when running)
- Creates all REST endpoints defined in the specification
- Maps operations to direct routes using
operationId - Builds the complete REST API structure from the specification
The specification path is relative to your workspace folder. The OpenAPI specification file (book-summary-api.openapi.yaml) must be kept with your integration - Camel needs it at runtime to create the REST endpoints. Make sure it’s in the same directory as your route file. Kaoto will validate the file path.
Step 2: Implement the Direct Route
The OpenAPI specification uses the operationId property to map the operation to direct:getBookFunExtract. Now you’ll implement this direct route in Kaoto using the Design view to add steps visually.
Replace the timer component: Click on the timer component and replace it with a Direct component
Configure the direct endpoint: In Endpoint Properties > name, enter
getBookFunExtractAdd removeHeaders processor: Insert a removeHeaders processor between the direct endpoint and the setBody processor
- Set the pattern to
CamelHttp* - This removes all headers starting with
CamelHttpthat might interfere with the external API call
- Set the pattern to
Add first setHeader processor: After removeHeaders, add a setHeader processor
- Set name to
x-rapidapi-host - Change the expression type from Simple to Constant
- Set expression to
project-gutenberg-free-books-api1.p.rapidapi.com - This sets the RapidAPI host header required by the Gutenberg API
- Set name to
Add second setHeader processor: Add another setHeader processor
- Set name to
x-rapidapi-key - Keep expression type as Simple
- Set expression to
{{gutenberg.api.key}} - Add your API key in the
application.propertiesfile in your workspace - This sets your API key using a property placeholder for security
- Set name to
Add toD processor: Add a toD (dynamic to) processor
- Set the uri to:
https://project-gutenberg-free-books-api1.p.rapidapi.com/books/${header.id}?bridgeEndpoint=true - This makes a dynamic HTTP call to the Gutenberg API using the book ID from the path parameter
- Set the uri to:
Update setBody processor: Modify the setBody processor
- Change expression type to JSONPath
- Set expression to
$.results[0].summary - This extracts the book summary from the JSON response
Update log processor: Modify the log processor
- Set message to
Book summary: ${body} - This logs the book summary for debugging and verification
- Set message to

Testing in Kaoto
Run the Integration
Before running your integration, you need to configure Kaoto’s run settings. Follow these steps carefully:
Step 1: Open VS Code Settings
Open VS Code Settings:
- macOS: Press
Cmd + ,or go to Code > Preferences > Settings - Windows/Linux: Press
Ctrl + ,or go to File > Preferences > Settings
- macOS: Press
Important: Click on the Workspace tab at the top of the settings window (not “User”)
- This ensures settings only apply to this project
- Creates a
.vscode/settings.jsonfile in your project folder
Step 2: Configure Kaoto Run Settings
In the search bar, type
kaototo filter Kaoto-related settingsFind and configure Kaoto: Run Arguments and Kaoto: Run Folder:
- Add:
--management-port=8080 - This sets a separate port for JBang management to avoid conflicts
- Add:
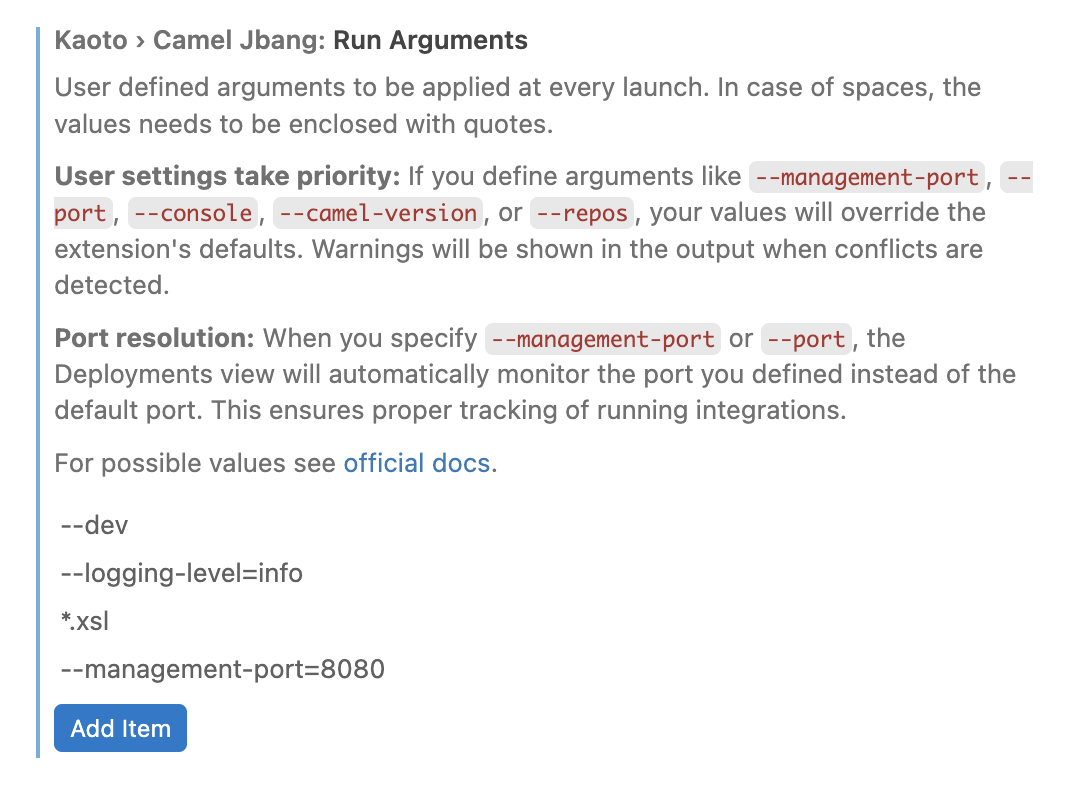
Kaoto settings run arguments
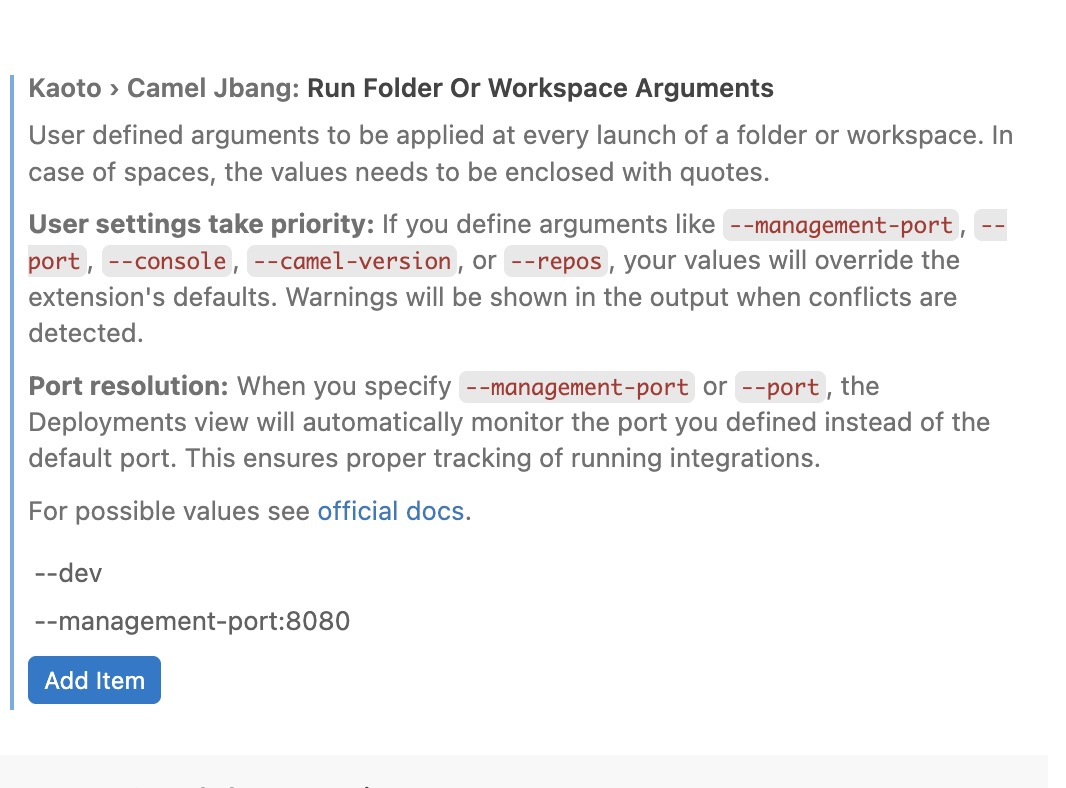
Kaoto settings run folder
Why Workspace-Level Settings Matter
Always configure Kaoto run settings at the workspace level (not globally):
- Global settings problem: Apply to all VS Code projects, meaning you can only run one integration at a time across all your projects
- Workspace settings solution: Each project has its own isolated configuration in
.vscode/settings.json - Benefit: Run multiple integrations simultaneously in different workspaces without conflicts
- How to verify: Check that you clicked the “Workspace” tab in settings, not “User”
Step 3: Reload and Run
Reload VS Code: Press
Cmd/Ctrl + Shift + P, type “Reload Window”, and press Enter- This ensures VS Code picks up the new settings
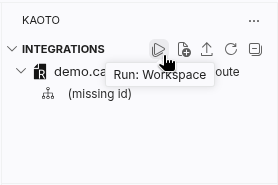
Run the integration: In Kaoto, click the Run button in the folder
- Kaoto will start your integration using JBang
- You should see output in the terminal showing the integration starting up
Running the route
Test the Endpoint
Open a terminal and run:
curl http://localhost:8080/books/1342/fun-extract
You should receive a JSON response with the book summary for “Pride and Prejudice” (book ID 1342).
Try Different Books
Test with other Project Gutenberg book IDs:
# Frankenstein
curl http://localhost:8080/books/84/fun-extract

# The Adventures of Sherlock Holmes
curl http://localhost:8080/books/1661/fun-extract
Key Concepts
API-First: Link, Don’t Create
The API-first approach means:
- Link the OpenAPI specification in your REST service
- Don’t manually create each endpoint in Kaoto
- Camel reads the spec at runtime to create all endpoints
- The OpenAPI file must be kept with your integration
- Kaoto visualizes the operation implementation
Learn more about Apache Camel REST DSL
openApi.specification Property
The openApi.specification property is the core of API-first:
- rest:
    openApi:
      specification: book-summary-api.openapi.yaml
This single property tells Camel to:
- Load and parse the OpenAPI specification file at runtime
- Create REST endpoints for all paths defined in the spec
- Use
operationIdto map operations to direct routes - Build the complete REST API structure from the specification
The OpenAPI specification file must be present when running the integration - it’s not just used during development.
Learn more about OpenAPI and Camel
Direct Routes as Implementation Targets
Direct routes act as internal endpoints that can be called from REST operations. This separation provides:
- Reusability: The same direct route can be called from multiple REST operations
- Testability: Direct routes can be tested independently
- Maintainability: Implementation logic is separate from API definition
Learn more about Camel Direct Component
Property Placeholders
Using property placeholders like {{gutenberg.api.key}} allows you to:
- Keep sensitive data out of your code
- Use different values in different environments
- Manage configuration centrally in
application.properties
Learn more about Property Placeholders
Summary
This documentation demonstrated:
- ✅ Using the API-first approach by linking an OpenAPI specification
- ✅ Letting Camel read the spec at runtime to create REST endpoints
- ✅ Understanding that the OpenAPI file must be kept with your integration
- ✅ Visualizing the linked endpoints in Kaoto’s Design view
- ✅ Implementing only the direct route logic (not the endpoints themselves)
- ✅ Running and testing the REST API using Kaoto
Next Steps
- Code-First Approach - Learn how to import OpenAPI specs using the visual REST Import Wizard
- Extending with REST Editor - Add new endpoints using the visual REST Editor